
Mushroom Barley Soup for the Coldest Days
Winter storms call for serious comfort food, and this Mushroom Barley Soup delivers. When the snow is deep and the air is biting, a steaming bowl of this earthy, hearty soup feels like exactly the right thing. It’s filling, warming, and endlessly satisfying—winter food at its best.
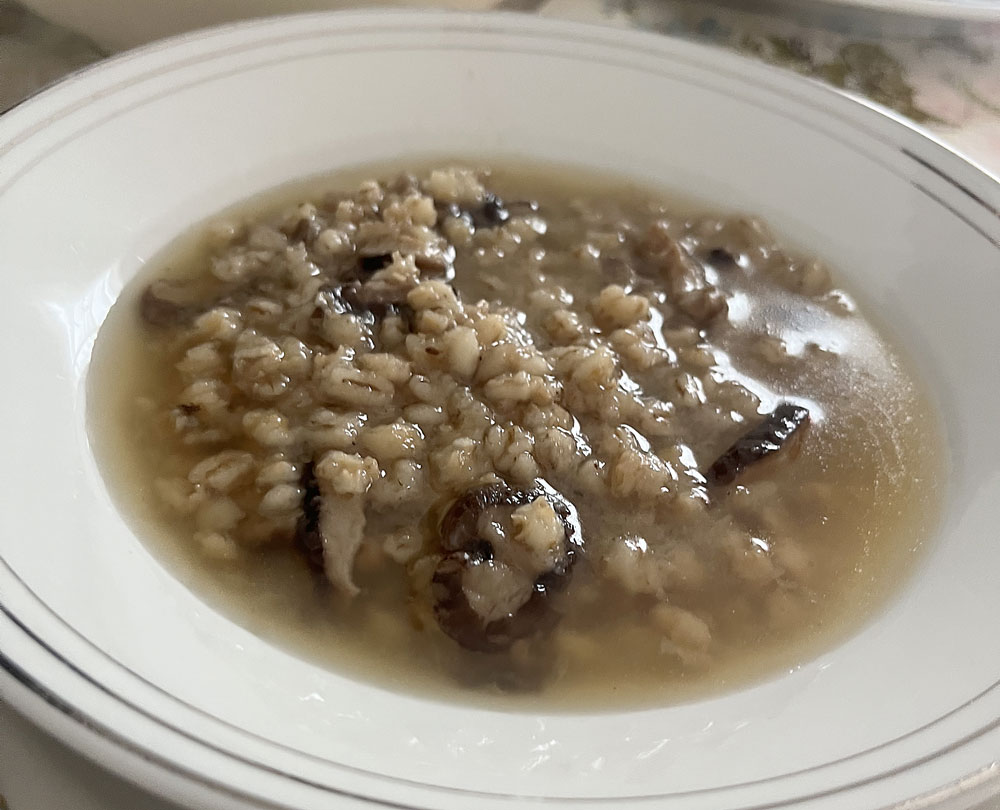
At the heart of it is our homemade veggie broth. We make our broth from scraps that we save with some bay leaf, salt, and pepper. It’s proof that a simple, well made base can turn humble ingredients into something that feels both nourishing and special, exactly what we crave when winter is at its coldest.
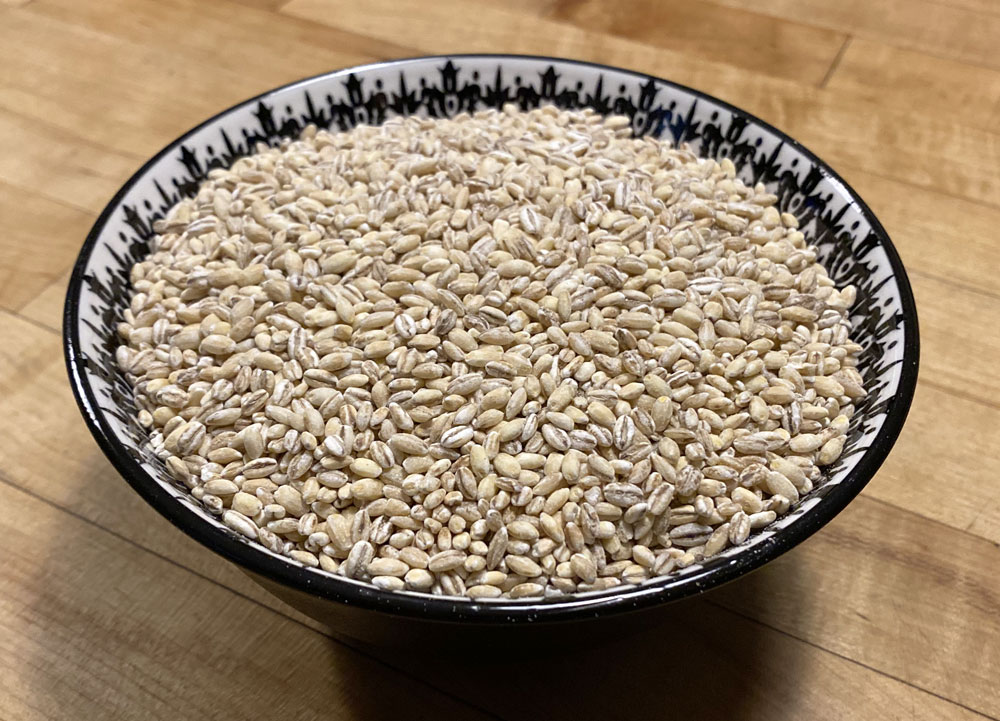
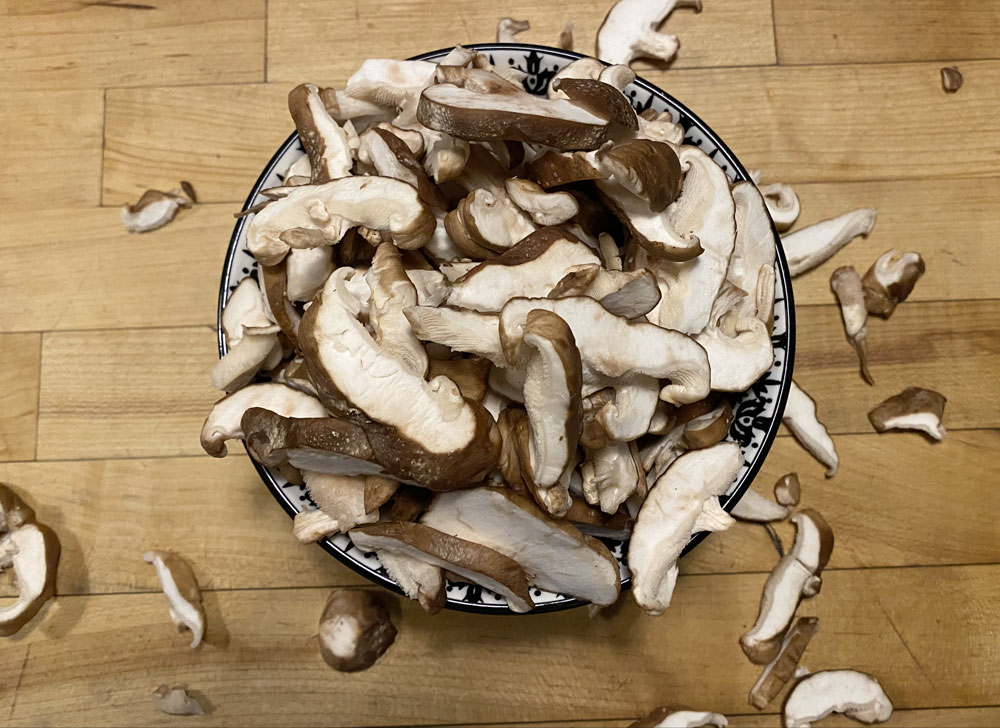
The ingredients are simple and wholesome:
Veggie Broth - 12 cups (3 quarts)
Olive oil - 1-2 tbsp
Shitake Mushrooms, sliced - 1 pound
Pearlized Barley - 1 cup
Salt & Pepper to taste
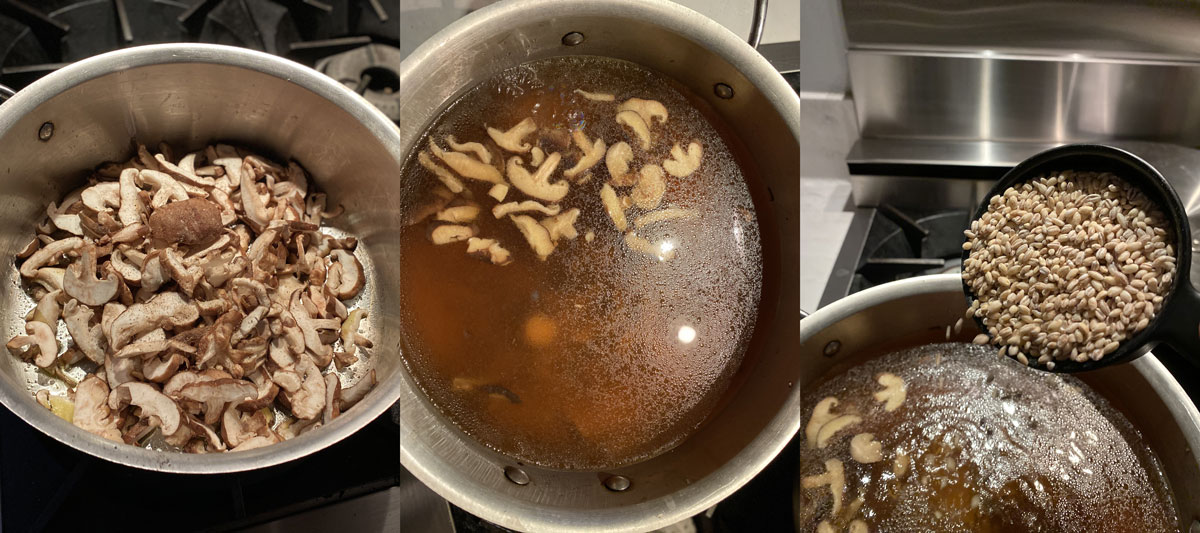
Begin by sautéing the mushrooms in some olive oil. Some of the mushrooms will stick to the pan as they brown. This is ok and will be released from the pan when you add the broth. Add in the veggie broth and bring to a simmer. Add in the barley, stir, and bring to a gentle boil. Turn the mixture down to your lowest setting and in about 30 minutes you will have a fantastic soup.
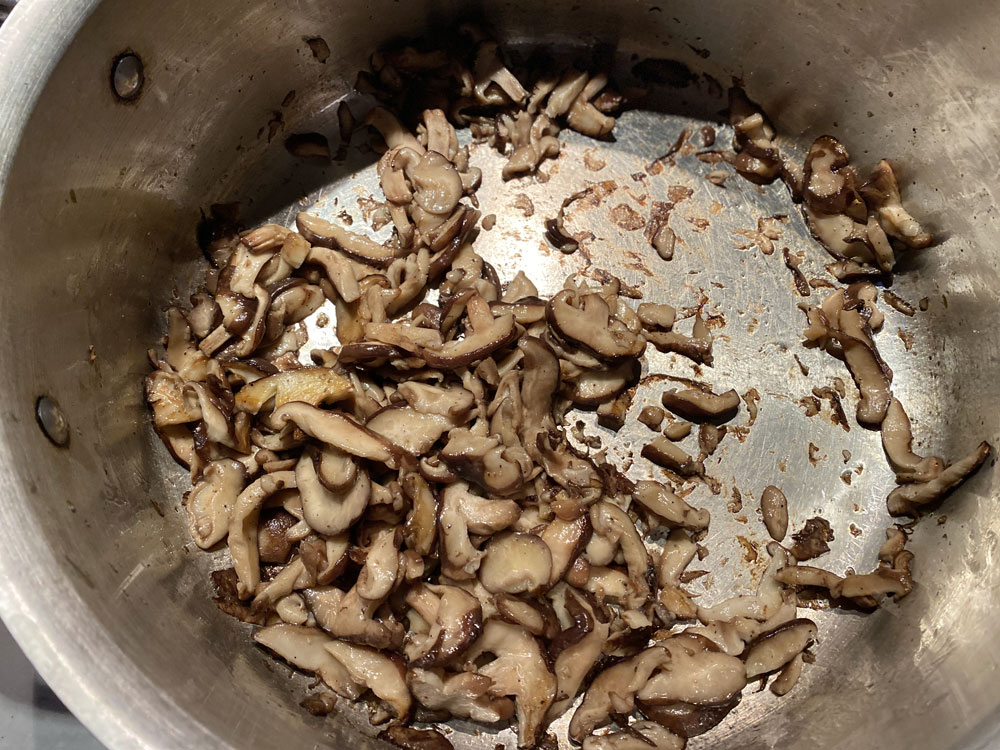
While there are broth options for mushroom barley soup, we always come back to our homemade veggie broth. It is earthy, deeply savory flavor pairs beautifully with the mushrooms and barley, letting each ingredient shine without overpowering the others. A simple combination, but one that feels thoughtful and deeply comforting. Proof that the best winter meals don’t need to be complicated.
So when the days are short, the nights are long, and the cold seems to linger a little too stubbornly, keep this soup in your back pocket. Mushroom Barley Soup is the kind of meal that slows you down, warms you from the inside out, and makes winter feel a bit more manageable. Ladle it into your favorite bowl, curl up somewhere cozy, and let this simple, nourishing soup do what it does best—comfort, restore, and satisfy.
This Article May Also Interest You: Two Years, and the Journey Continues
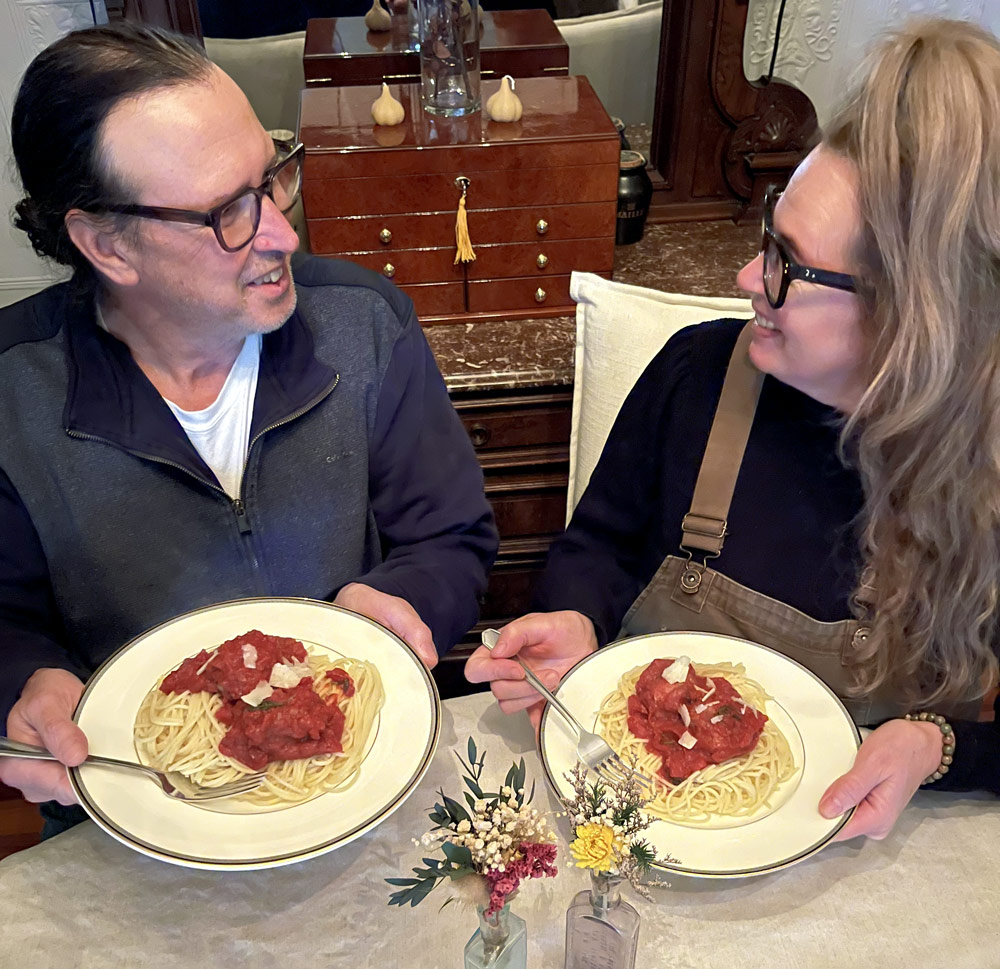
Hearty Homemade Meatballs
As the air turns crisp and the golden hues of fall settle in, there's something undeniably comforting about the smell of a slow-simmering sauce drifting through the house. The days are shorter, the nights cooler, and with the holidays on the horizon, it's the perfect time to lean into hearty, soul-warming meals. In our kitchen, that means one thing: homemade meatballs.
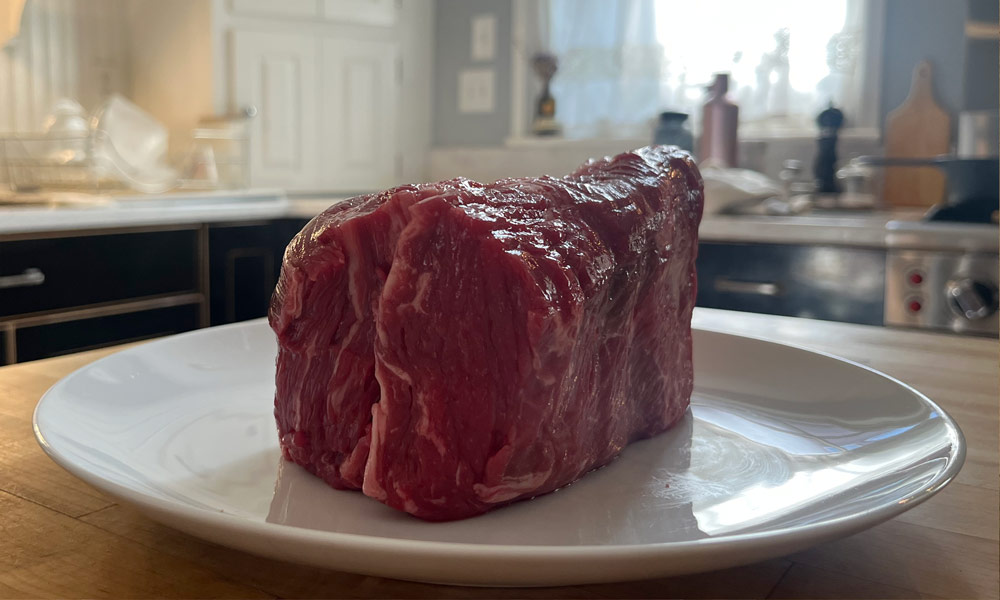
Crafted with care from a blend of freshly ground beef and ground pork, our meatballs are anything but ordinary. We start with quality ingredients—using the flavorful spinalis end of the beef shoulder and local ground pork—and blend them with fresh sourdough bread soaked in milk and eggs. The mixture is ground for the perfect texture, resulting in light, tender meatballs that roast beautifully in the oven.
Ingredients:
2 1/2 - 3 pounds: Beef shoulder (larger spinalis end)
2 pounds: Ground pork
3/4 cup: Milk (we use skim, but any milk works)
5: Eggs - beaten
5-6 slices: Sourdough bread
1 tbsp: Kosher salt (if you use table salt adjust to just over 2 tsp)
1 tsp: Allspice
1: Whole nutmeg | 1 tsp: if using powder
1 1/2 tsp: Pepper corns | 1 tsp: if using ground pepper
1 tbsp: Italian season or burger season
The additional tools we use are:
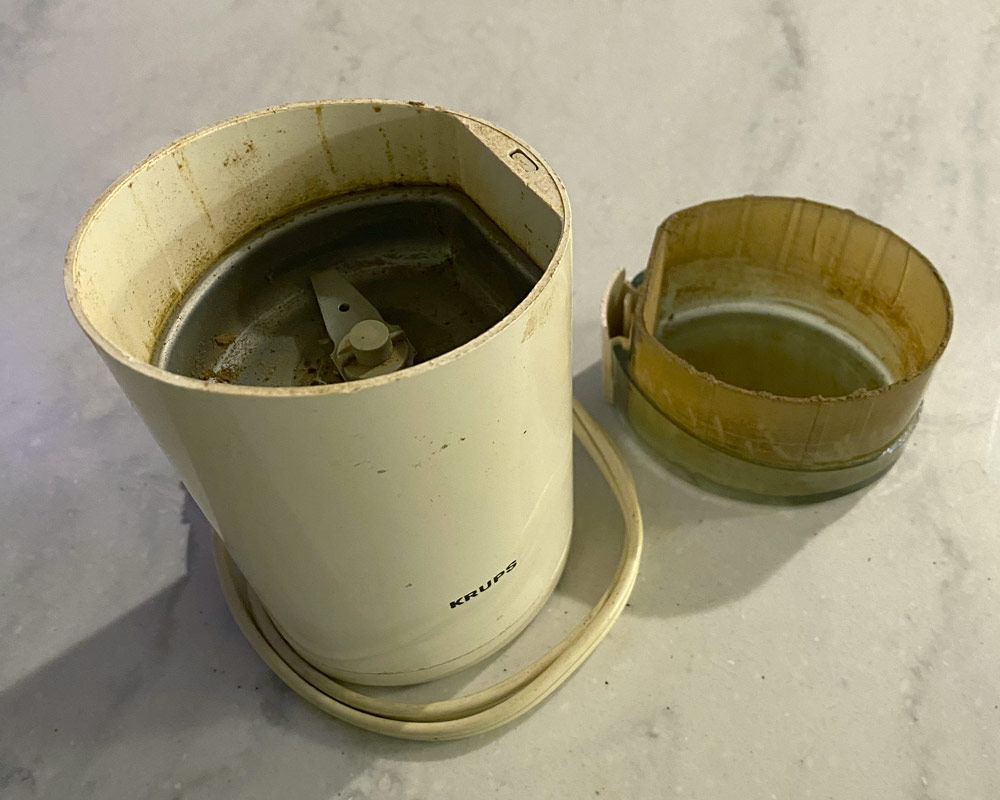
Spice Grinder (We use a small coffee grinder)

Food Grinder Attachment for our Mixer
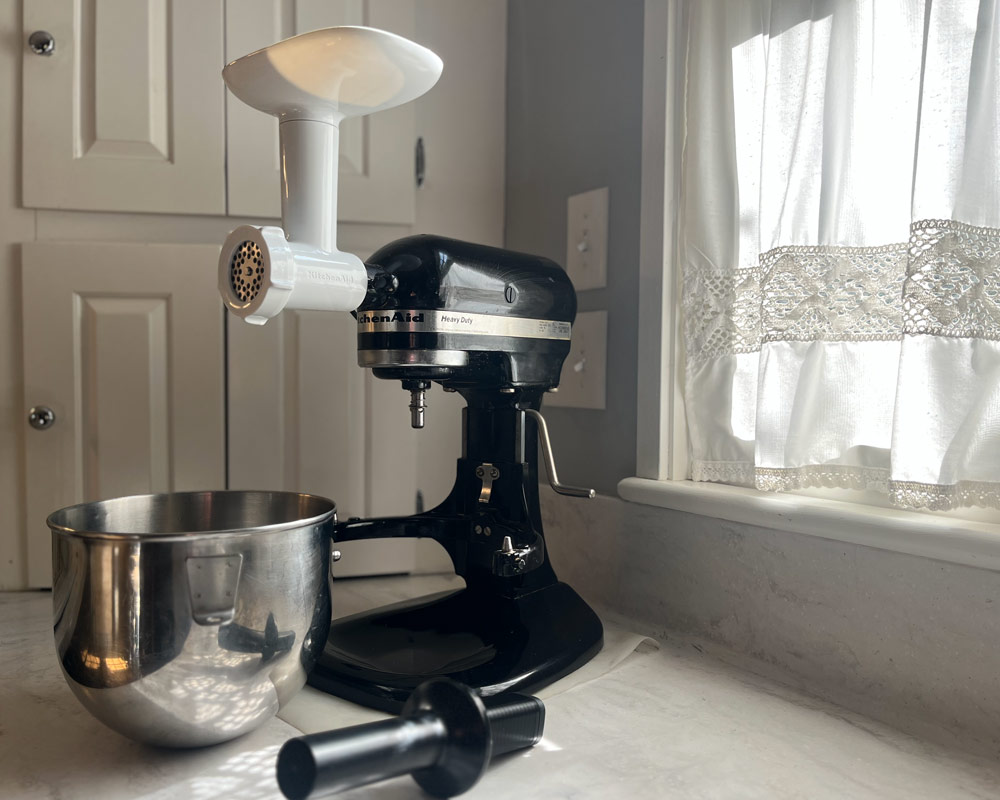
Stand Mixer
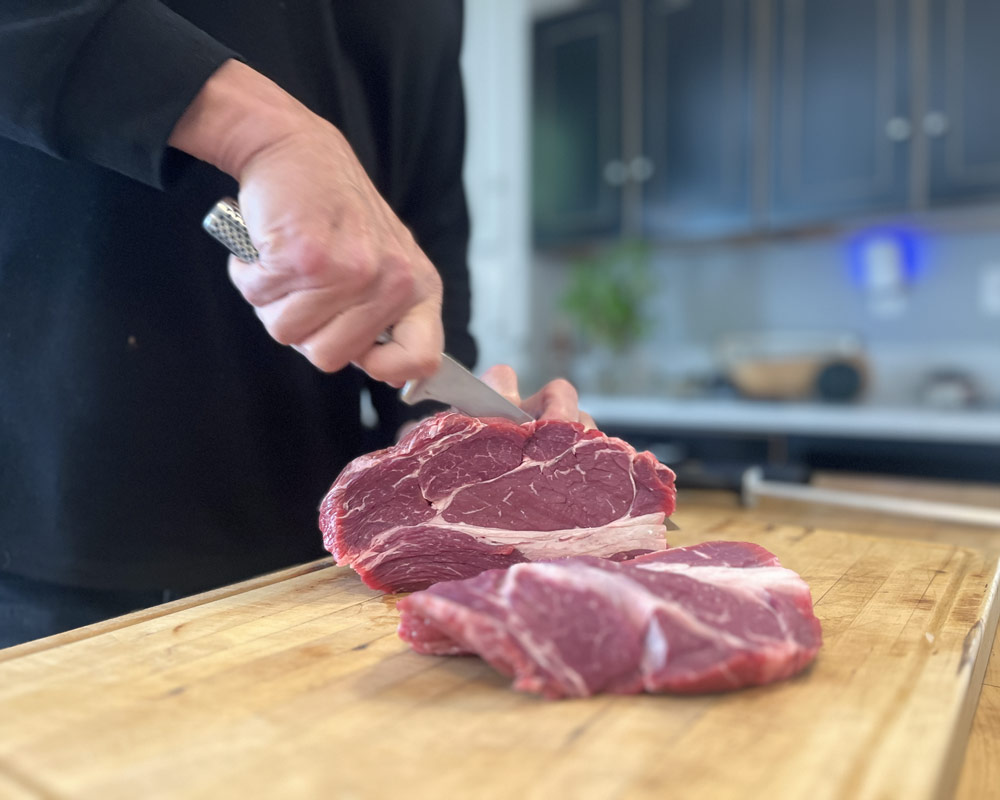
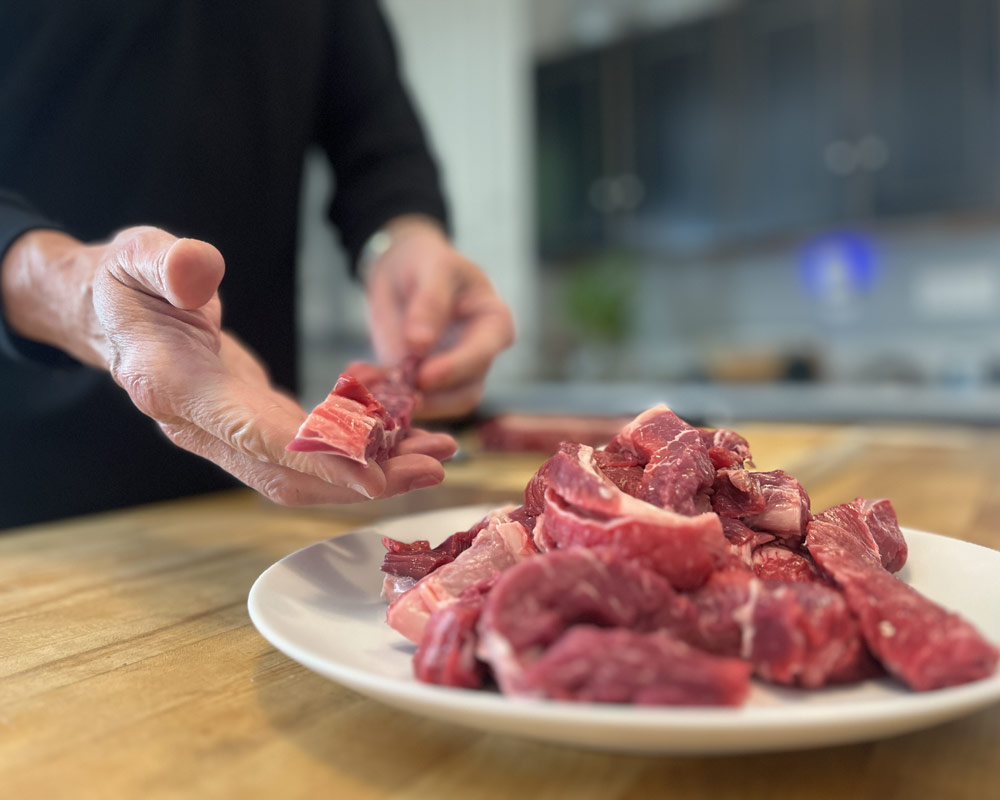
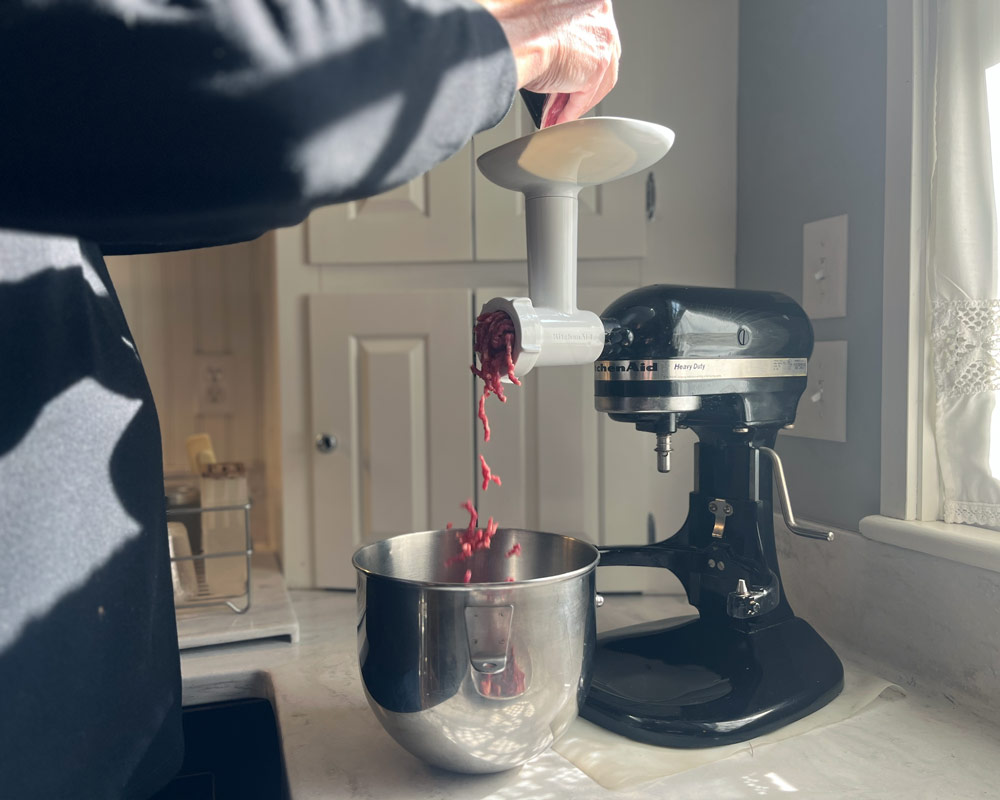
Begin with the beef. We choose the chuck or shoulder and ask for the end closest to the ribeye cut to get the largest portion of the spinalis (spineless is the fatty, tender tail on a ribeye steak. It continues through about half of the shoulder). This is cut into strips approximately 3/4 inch by 3/4 inch to make it fit in the grinder easily. One thing to remember is to keep the meat as cold as possible. This helps the grinder to more efficiently cut the meat as it grinds.
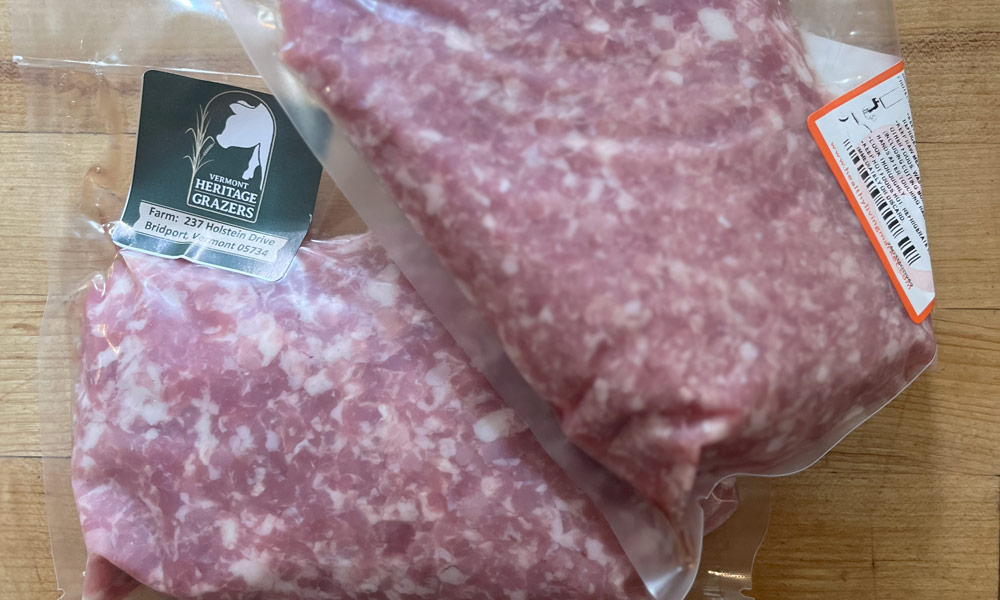
The pork we use is from a local producer in Vermont. They offer a freshly pre-ground product that works great in out meatballs. In the rare instance we cannot get the ground pork, we will use a shoulder cut and grind it in the same way we grind the beef.
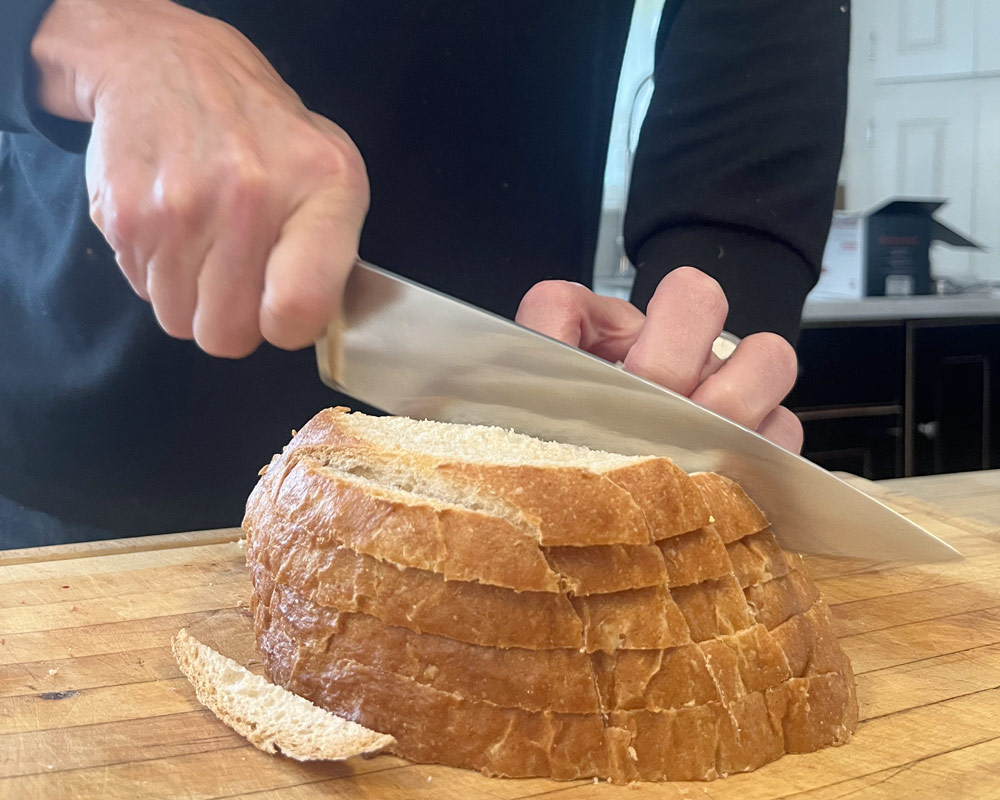
Before we cut the bread into chunks, we cut off the crusts and use them to push through the last of the meat. This will grind up the tough crusts while clearing the last of the meat from the grinder.
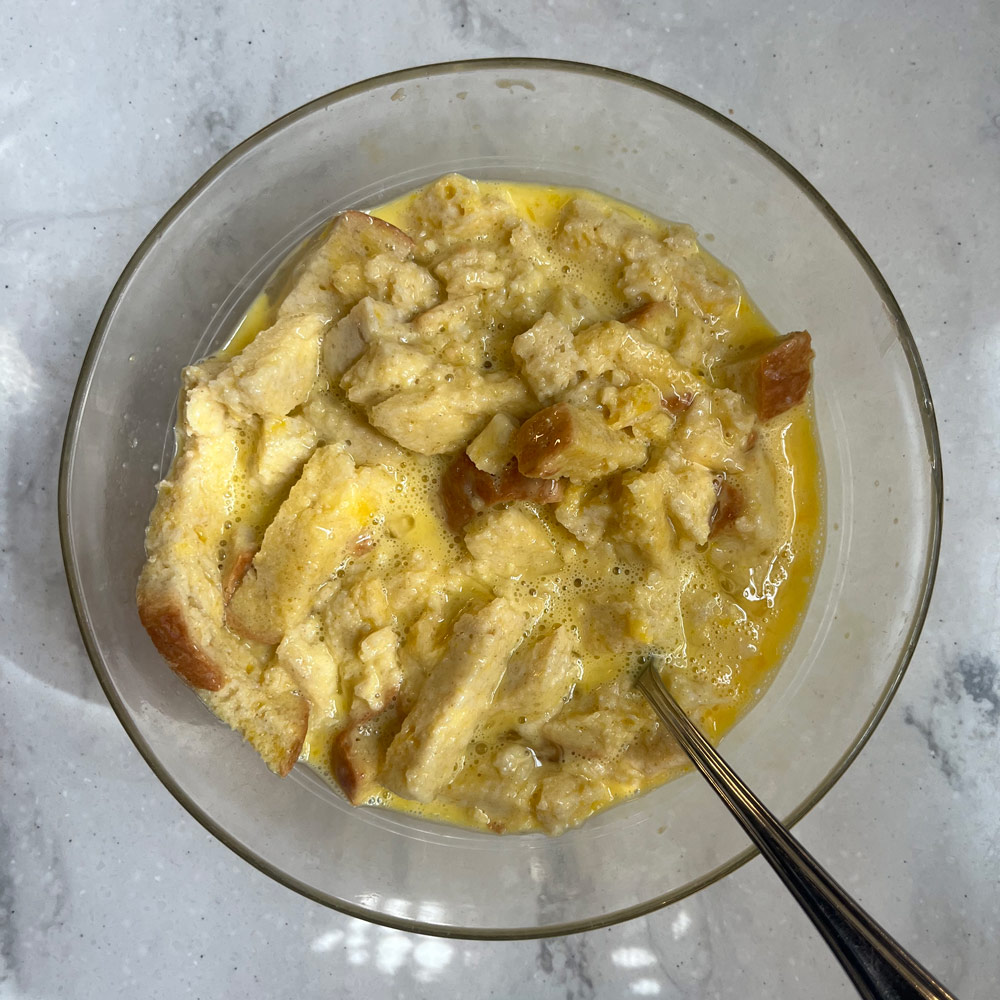
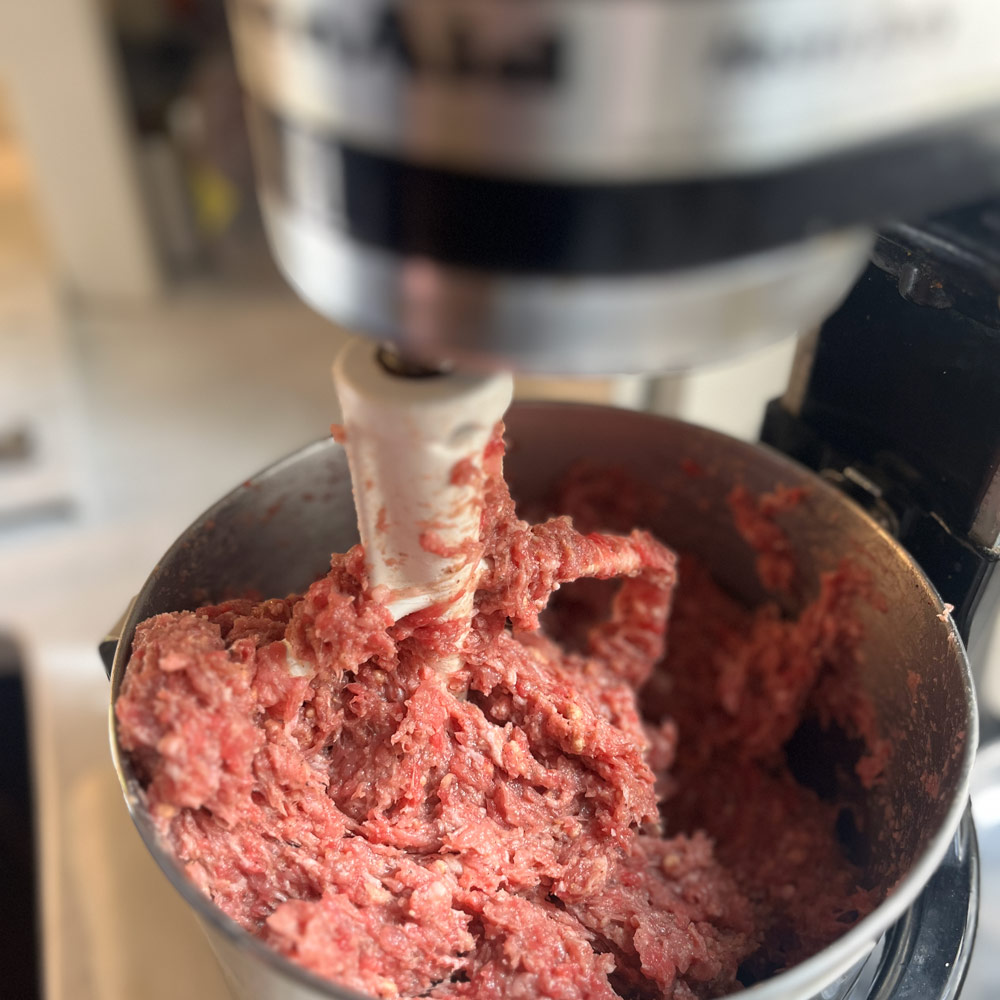
The remaining bread is then cubed into 3/8 inch sections and added to a large mixing bowl. I usually add the dry seasoning at this point and mix it into the bread well. Then add in the milk and the beaten eggs, and mix thoroughly. This mixture is then added to the meat mixture and mixed thoroughly.

After mixing the meat mixture thoroughly, the next step is creating the uniform meatballs. We use an ice cream scoop to measure our meat into consistent sized amounts. One tip when handling the meat is to keep a bowl of fresh cold water nearby. The water helps to keep the meat from sticking to your hands, so when you are rolling up the balls, the water helps to allow you to shape them without them becoming a sticky mess.

Cooking is the next step. We use an oven pan and roast ours in the oven at 350-425 degrees. If you have the time, you can also cook on the stovetop in a cast iron pan to get the maximum Miallard effect (browning process). This careful browning process only makes the meatballs more flavorful.
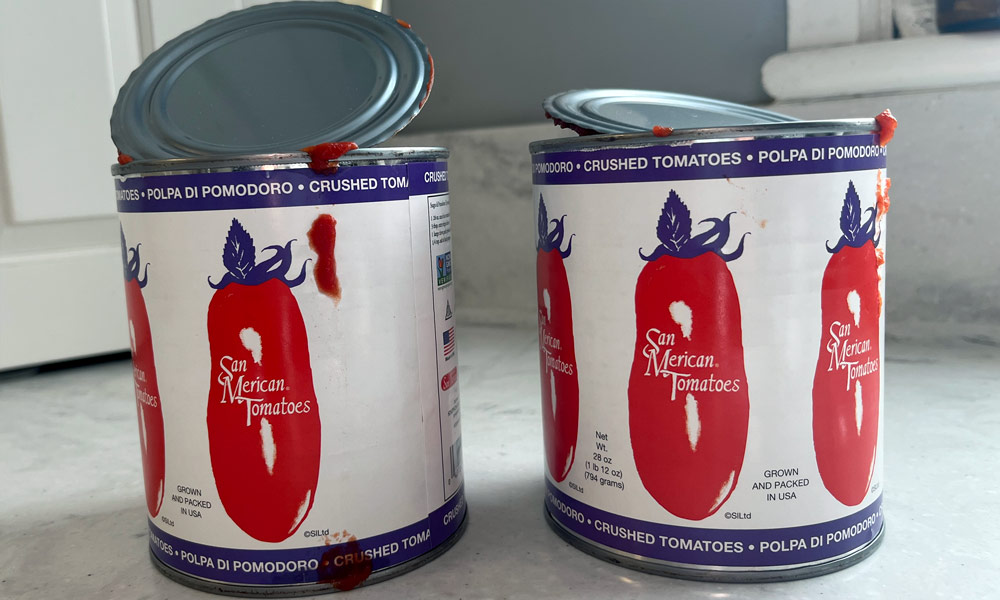
To complement the meatballs, we create a simple, classic tomato sauce. We begin with tomatoes. While San Marzano tomatoes are famous the world over, we use an American product that we have found to be more consistent. San Merican tomatoes are grown in the USA and are consistently delicious.
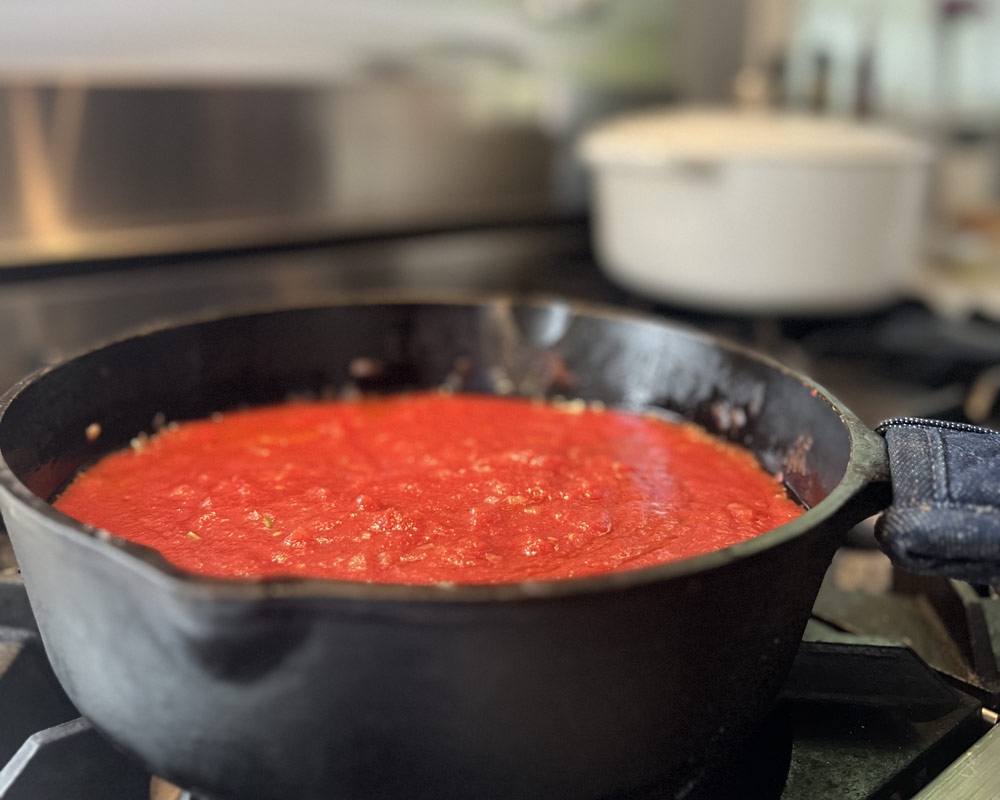
A bit of finely chopped onion, a couple cans of tomatoes, and a handful of basil leaves are gently simmered into a rich, simple sauce. The aroma alone brings a sense of home and nostalgia. Paired with spaghetti (There are many options for pasta, but we highly recommend a quality imported Italian spaghetti. Often referred to as bronze extruded and slow-dried, it is definitely worth the extra cost) and a generous ladle of sauce, this dish is our answer to chilly fall evenings—a comforting, classic meal that welcomes the season with open arms.

Easter Morning Magic: Our Creamy Duck Egg Quiche with Sausage & Peppers
A custardy twist on a classic—perfect for Easter brunch or any cozy weekend morning.

A Quiche with a Story
There’s something quietly celebratory about a homemade quiche. Maybe it is the golden crust, the creamy custard, or just the ease of baking something yummy that feeds everyone around your table. Our Easter quiche has all of that but with a little twist we discovered thanks to a very unexpected source: a friend with pet ducks.
One spring, our friend surprised us with a basket of fresh duck eggs. Not ones to waste a good gift, we cracked a few into our quiche recipe. The result? A lusciously creamy, custard-like texture that made us instant converts. Duck eggs are a little richer than chicken eggs, and their magic shows up beautifully in quiche.

This recipe is now a staple at our Easter brunch, though we’ll happily eat it year round. With sautéed Italian sausage, sweet peppers, caramelized onion, and a generous mix of Gruyere and cheddar cheese, this dish is equal parts hearty and elegant.
Ingredients
For one 9-inch quiche:
- 2 eggs (duck eggs preferred, but chicken eggs work too)
- 1 cup milk (we use skim, but whole works fine)
- 1/3 to 1/2 lb Italian sausage, cooked and diced (sweet or hot)
- 1/2 large green bell pepper, chopped
- 1 medium sweet onion, chopped
- Olive oil
- Salt and pepper, to taste
- 1/2 cup shredded gruyere cheese
- 1/2 cup shredded cheddar cheese
- 1 pie crust, homemade or high-quality store-bought
Instructions
1. Preheat & Prep
- Preheat your oven to 450°F
2. Mix the Custard
- In a bowl or mixer, whisk together the eggs and milk until smooth.
- Set aside. Do not salt this mixture—the cheese and sautéed fillings will bring plenty of seasoning
3. Sauté the Fillings
- In a skillet, heat a drizzle of olive oil
- Add the chopped onions and peppers. Season lightly with salt and pepper
- Sauté until the veggies release all their moisture and begin to stick slightly to the pan. This step is key! Removing excess water ensures your quiche has a firm, creamy texture. Stir in the cooked, diced sausage and heat through
4. Assemble the Quiche
- Spread the sautéed mixture evenly into the crust
- Leave a small open space (about ¾ inch in diameter) in the center—this helps the custard set evenly
- Pour in the egg mixture slowly
- Top with shredded Gruyere and cheddar (we do a 1:1 ratio, about a generous ½ cup each)
5. Bake
- Bake at 450°F for 15 minutes
- Then lower the temperature to 350°F and bake for another 30–45 minutes
- Start checking at the 30-minute mark. The quiche is done when the center is set and the top is lightly golden
- Tap the edge of the crust—if the center doesn’t jiggle, it’s ready
6. Rest & Serve
- Let the quiche cool for at least 10 minutes before slicing. This helps it finish setting and makes for cleaner cuts

Serving Tips
- This quiche is perfect warm, but leftovers taste fantastic gently reheated
- Serve with a side salad or fresh fruit for a balanced brunch
- It keeps well in the fridge for 3–4 days and reheats best in the oven or toaster oven
We love how this recipe brings together simple ingredients with a touch of something special. Whether you’re hosting brunch or just treating yourself to something cozy and satisfying, this quiche brings richness, comfort, and a little story to the table.
Have you ever cooked with duck eggs? Let us know in the comments—we’d love to hear how you’ve used them!

Super Bowl Chili: The Ultimate Game Day Dish
Super Bowl Sunday is here, and whether you are a die hard fan or just in it for the snacks, chili is always a go to comfort dish. In our home, we have been perfecting this recipe for years, making it the go to dish for winter gatherings.
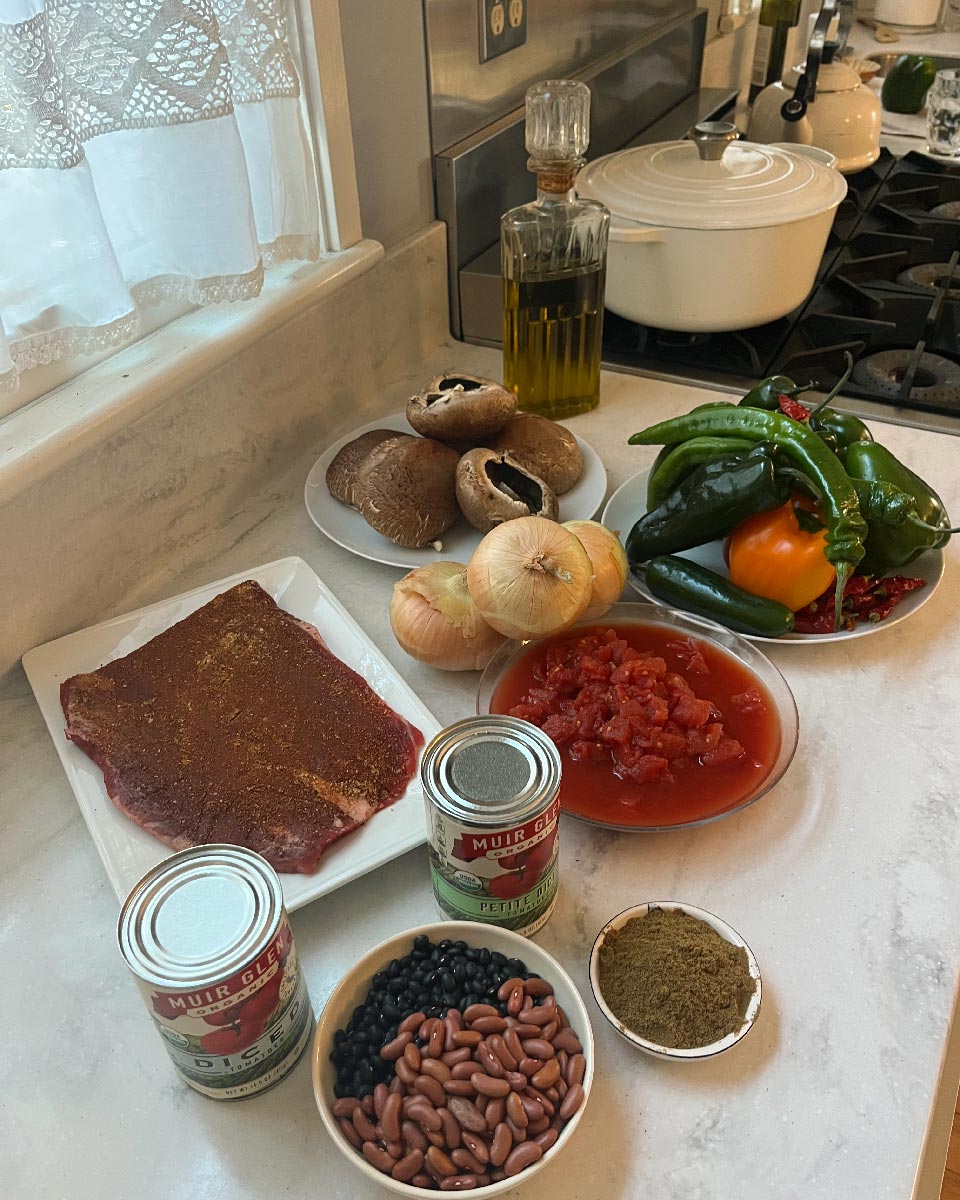
Chili is a Autumn & Winter favorite, and while we have made this dish all season long, we have developed a few small tweaks to make it perfect for Super Bowl Sunday. The biggest change? The way we prepare the meat. During the colder months, we skip grilling and slow cook the meat in the oven, allowing it to develop deep, rich flavors that are perfect for serving a crowd. Plus, with the game day excitement, this chili is easy to make ahead of time and serve in a big pot, so you can focus on enjoying the game.

Our recipe is inspired by Texas style chili, using whole cuts of meat instead of ground beef. Though we are flexible with the cut of meat (flank steak is a favorite), this hearty, flavorful chili has been a comforting staple during the cold winter months and holiday season for years. Over time, we have adjusted the recipe to be a bit more vegetable forward, finding that it creates a better balance in the bowl. And the best part? It's easy to customize, so you can make it your own.
Ingredients:
1 1/2 - 1 3/4 pounds of flank steak, seasoned (we use The Chosen Rub)
24 oz dried beans
3 medium/large sweet onions, chopped coarsely
1 pound portobello mushroom caps, chopped coarsely
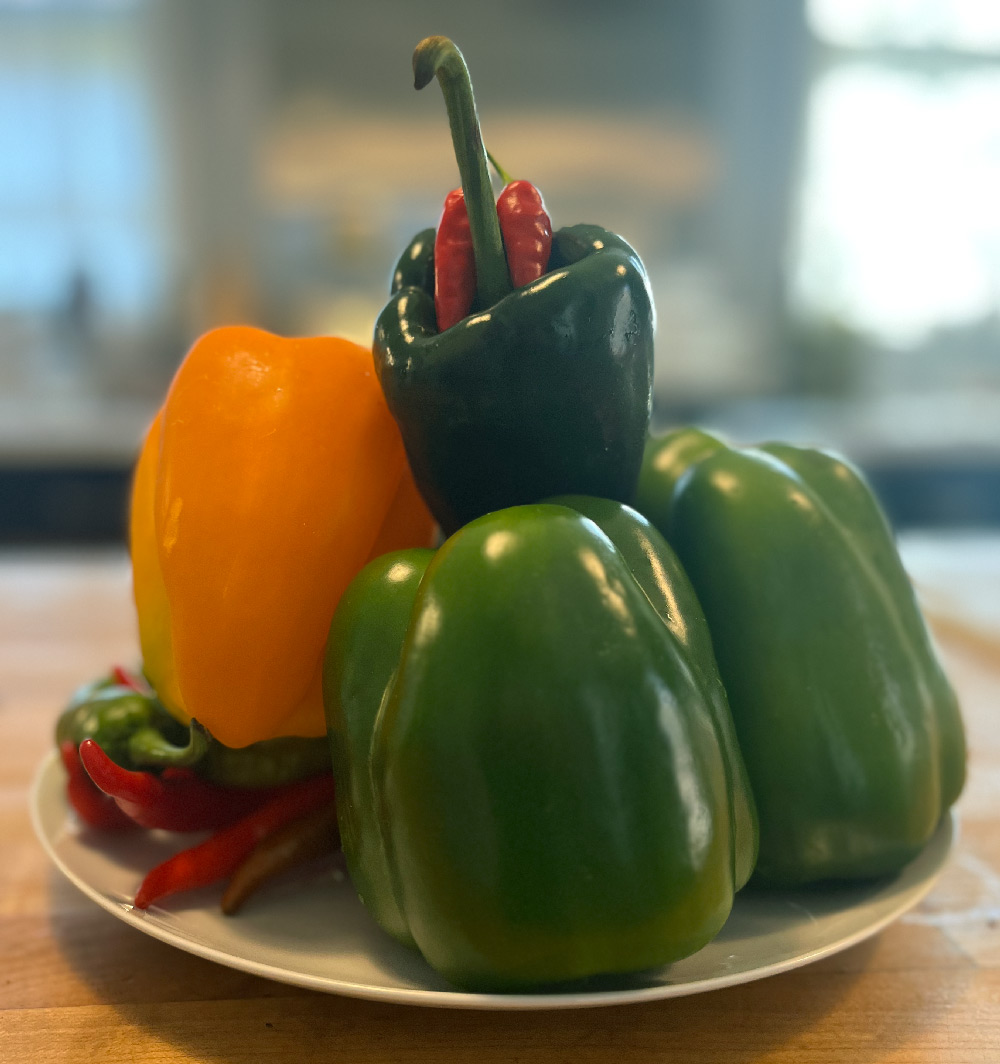
4 green bell peppers, chopped coarsely
4 jalapeno peppers, seeded and chopped medium-fine
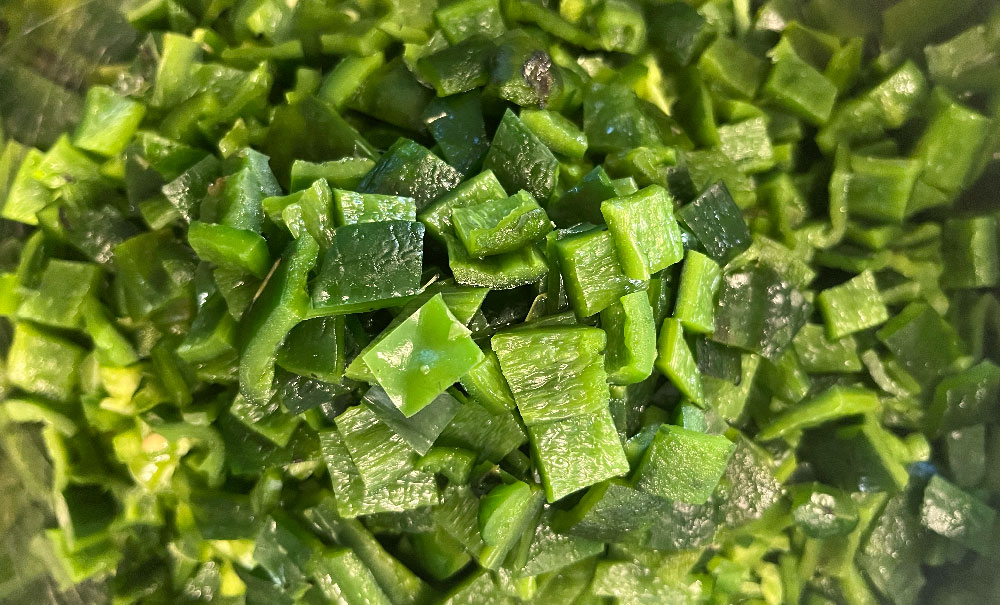
4 poblano peppers, skin burned and removed, seeded, and chopped coarsely
3 long chilies, seeded and chopped medium
2 cans (14.5 oz) petite diced tomatoes
2 cans (14.5 oz) diced tomatoes
Olive oil
Spices:
• Salt
• Pepper
• Allspice
• Ground cumin
• Chipotle powder
• Cayenne pepper
• The Chosen Rub
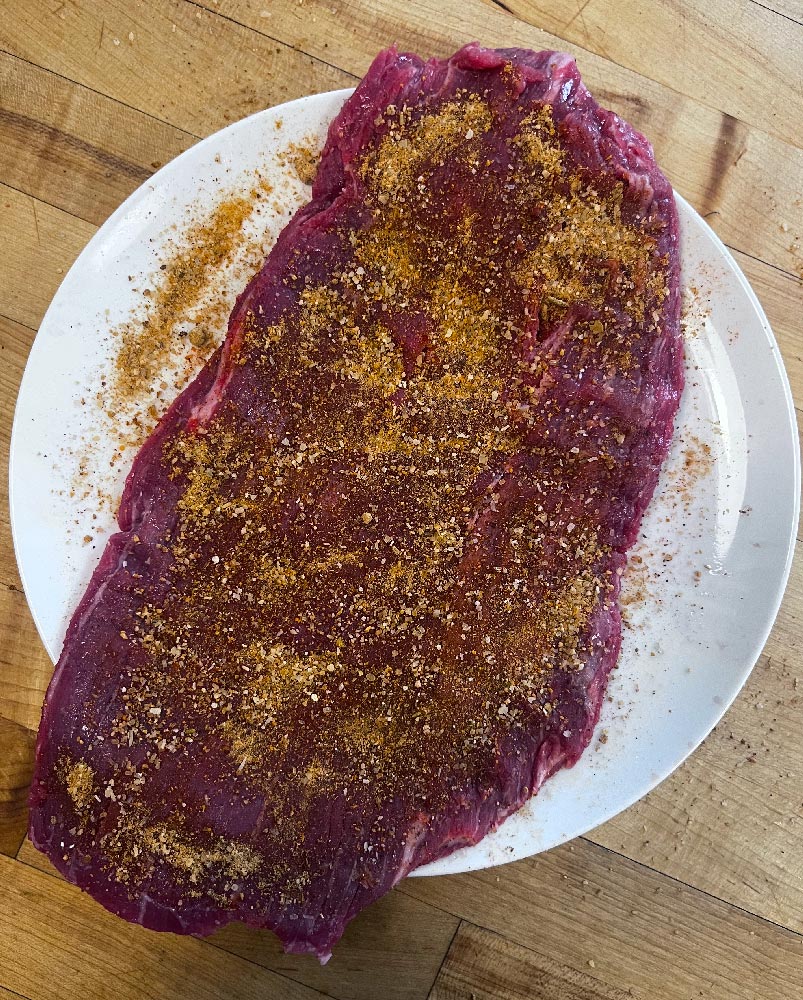
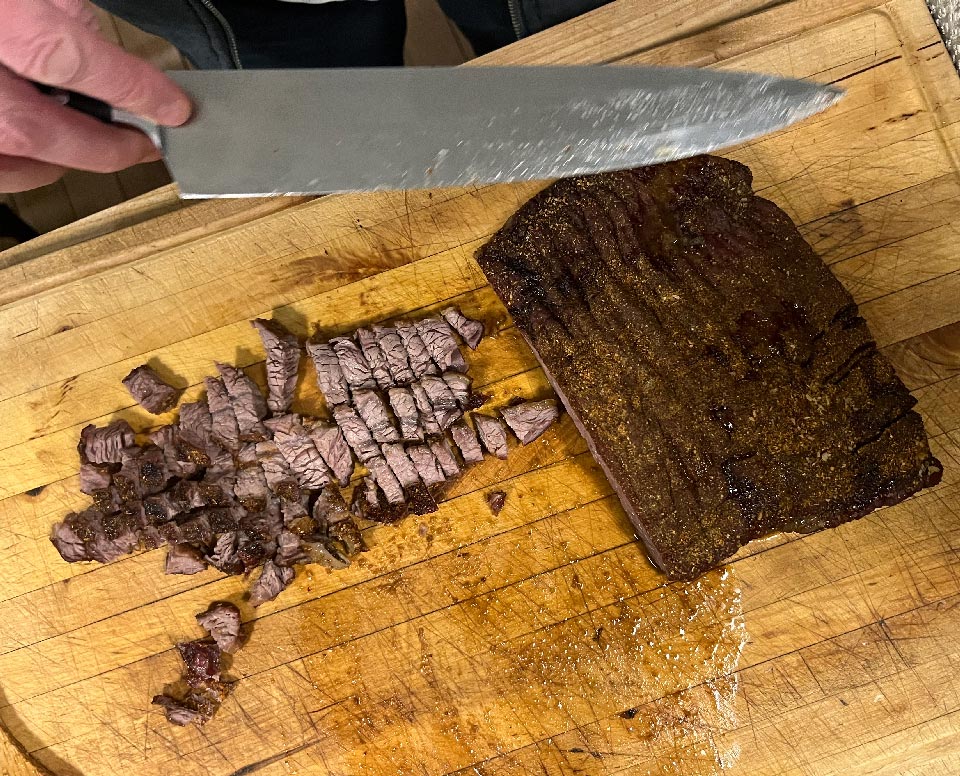
Prepare the Meat: Season the flank steak and let it rest at room temperature for about 30 minutes. Roast it in the oven at 225 to 250 degrees until fully cooked (this will take some time, so we usually start with this step). Once the meat is done, remove it from the oven and chop it into small, uniform chunks (about 1/4 to 3/8 inch). Reserve the meat along with its juices for later.
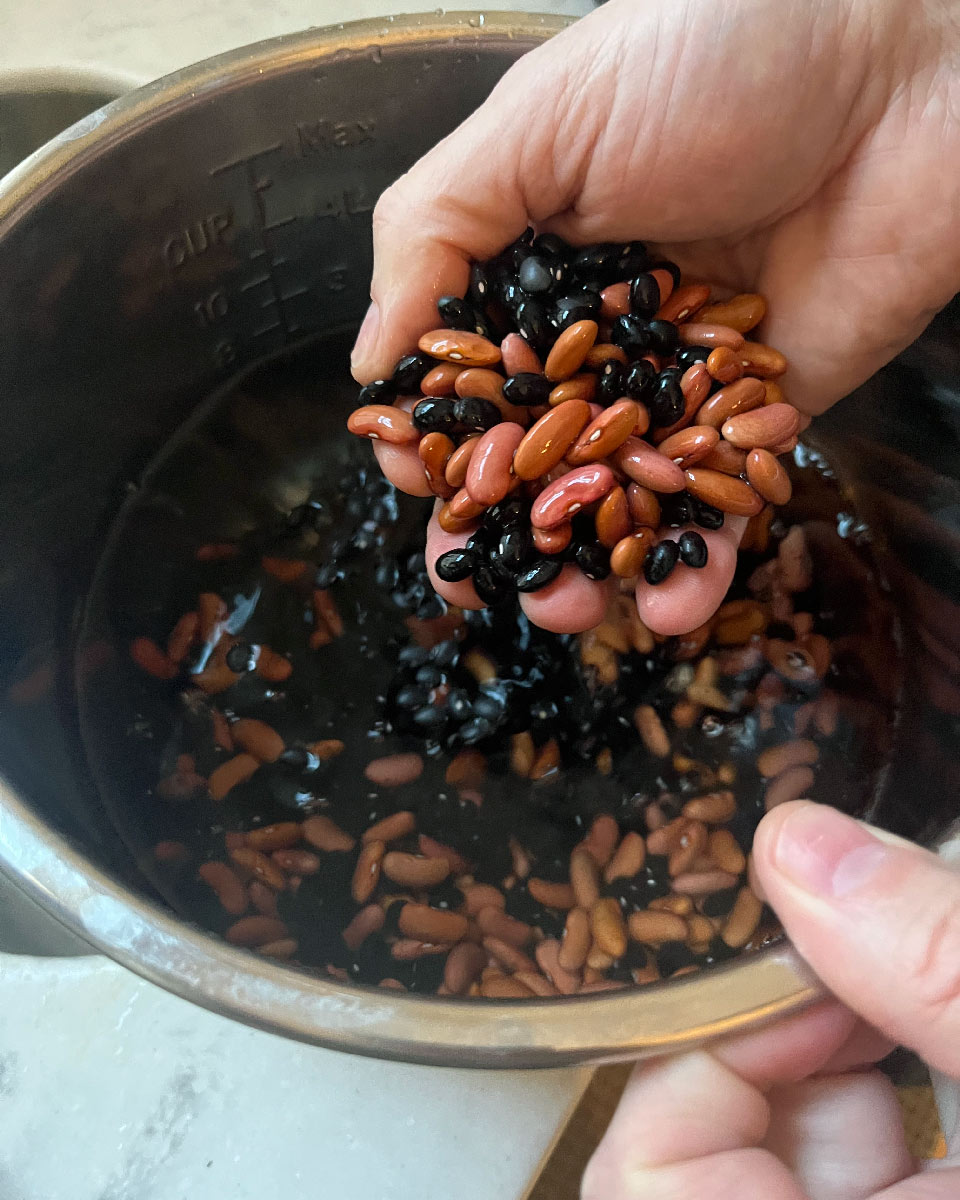
Cook the Beans: While the meat is roasting, prepare the beans. We use a pressure cooker for this step. After cooking, rinse the beans thoroughly and set them aside. For our chili, we use a 2/3 black bean and 1/3 kidney bean ratio, but feel free to mix it up based on your preference.
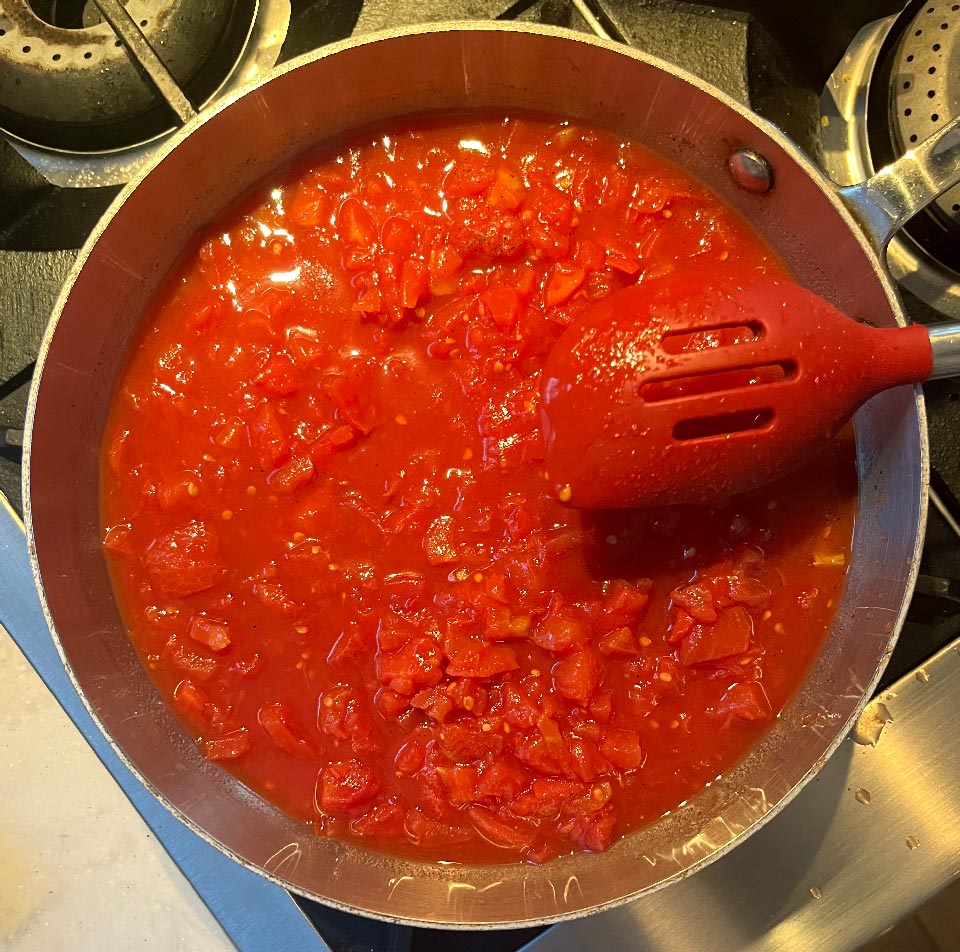
Desiccate the tomatoes: Using a saucer, add the tomatoes, season with a pinch of salt, and reduce the liquid. We use a spatter screen to protect the kitchen from the spray as the tomatoes reduce.
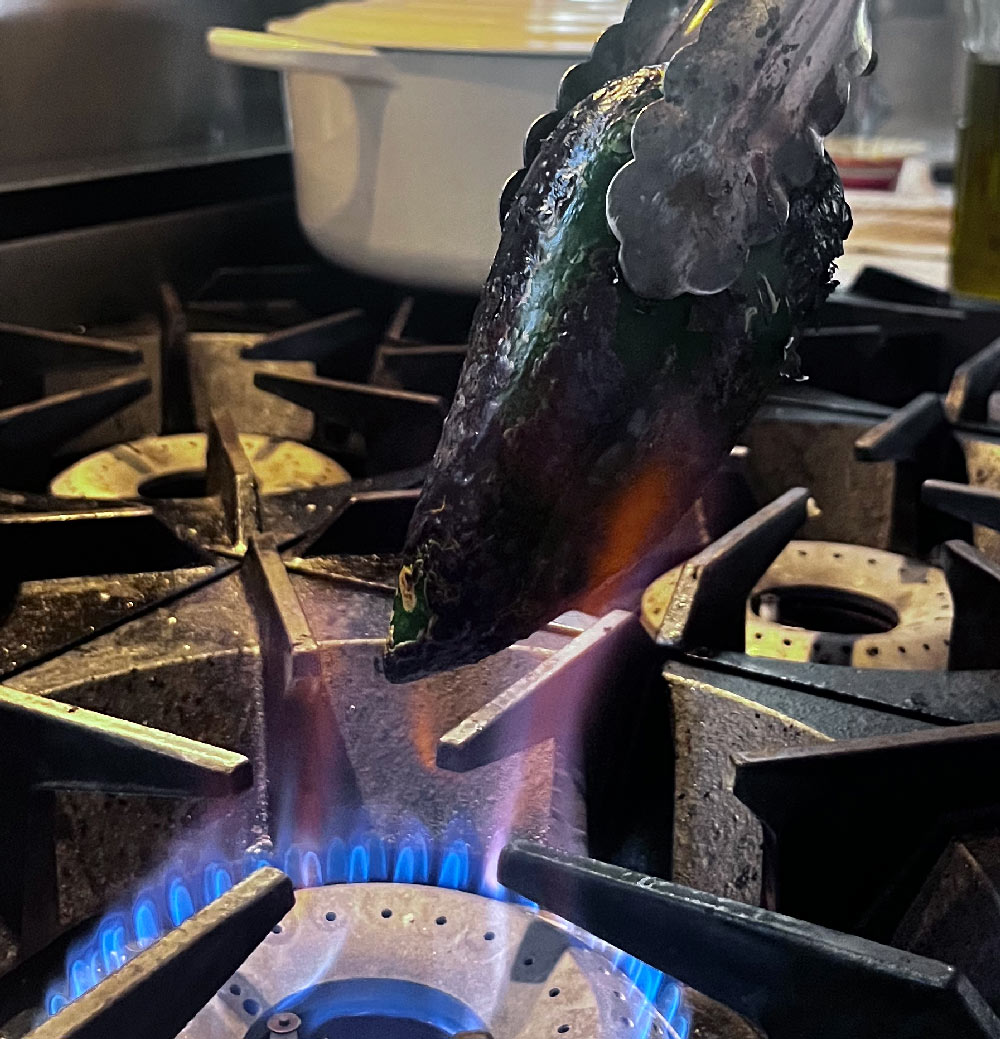
Char the Poblano Peppers: Char the poblano peppers on a stove top burner over an open flame, or broil them in the oven. Try to burn as much of the skin as you can, as it can be tough to remove if left unburned.
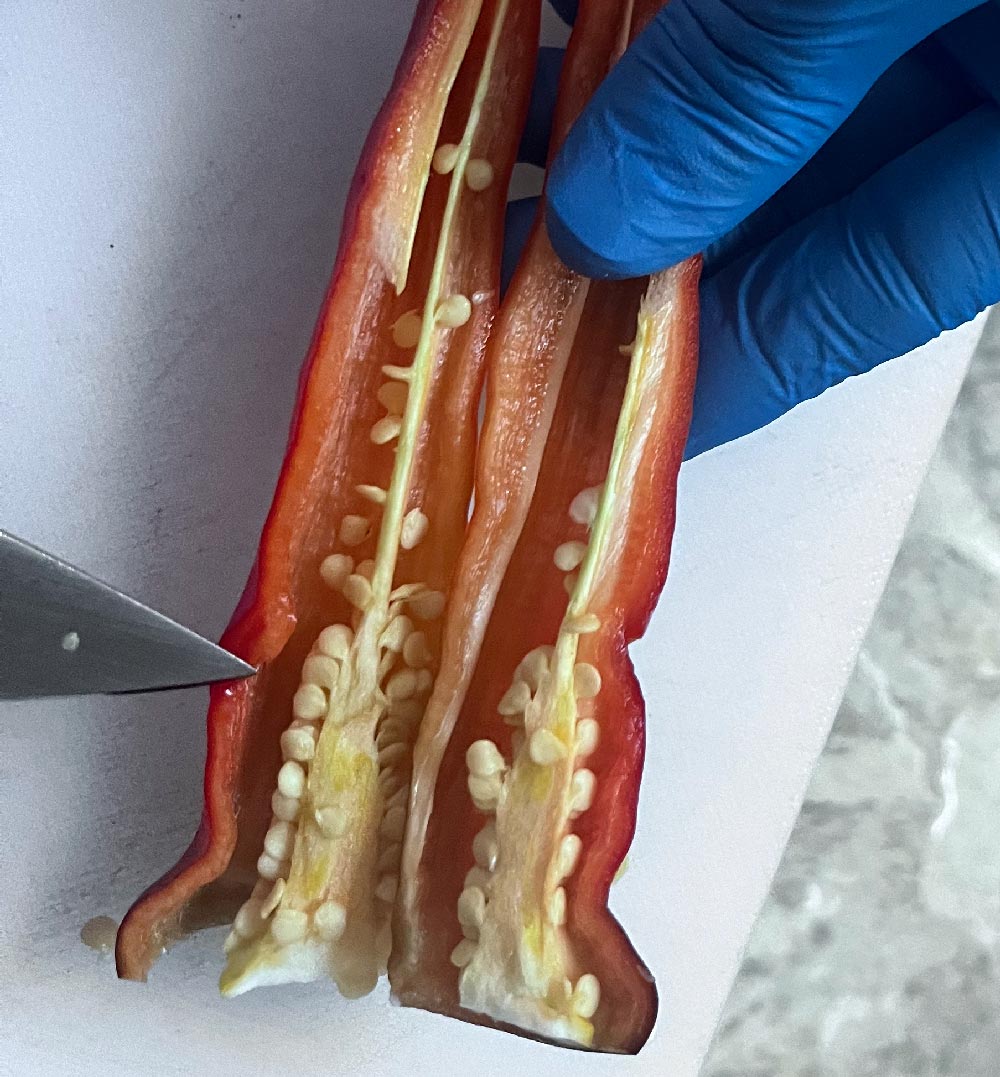
Seed and Chop the Hot Peppers: After charring, remove the skins and seeds from the poblano peppers. We also seed the hot peppers to control the heat level, though if you like your chili extra spicy, you can skip this step and add the seeds back in. We use gloves during this process to avoid transferring the oils from the peppers to sensitive areas like the eyes.
 |  |  |
The placenta is often the hottest part of the hot pepper. These scraps can be reserved and added back in to increase the heat if you chose. |
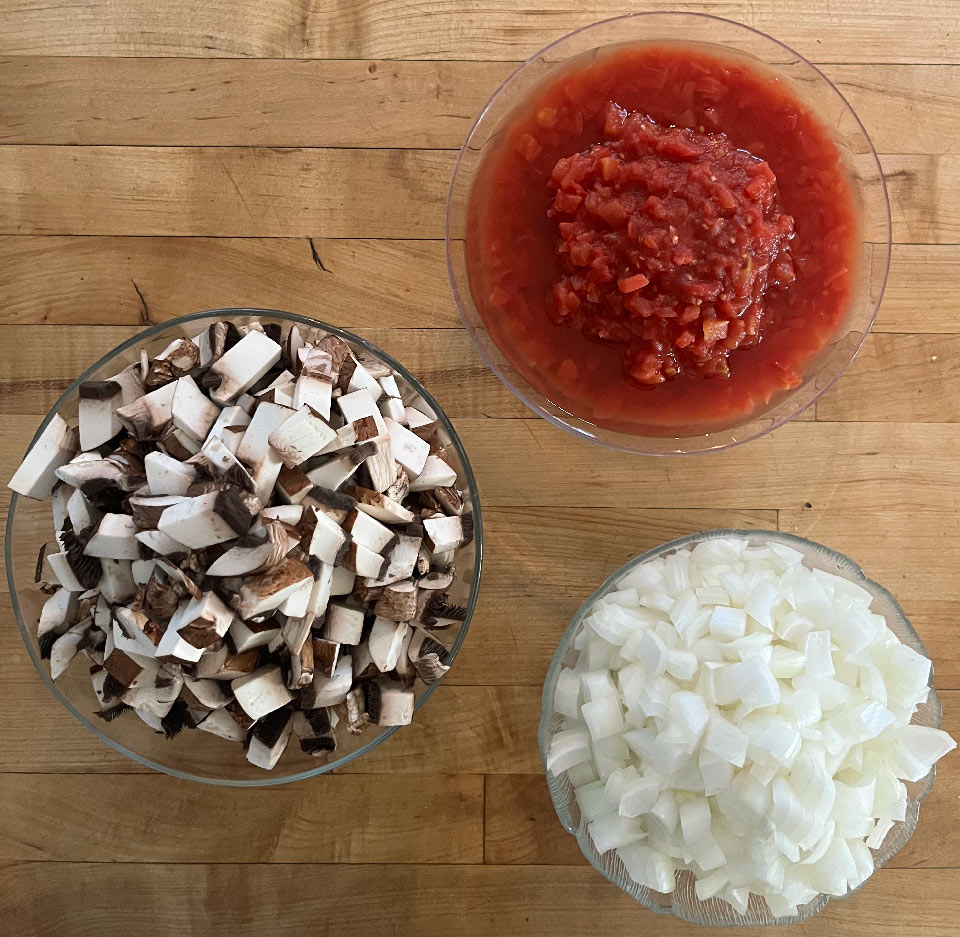
Prepare the Vegetables: Chop the mushrooms fairly large (around 1/2 inch by 1/4 inch), as they will shrink when sautéed. Chop the onions to 1/2 inch pieces. The tomatoes should be simmered in a saucier to evaporate most of their liquid.
Sauté the Vegetables: Heat a large (10-quart or larger) pan. Once the pan is heated, add a generous amount of olive oil, the onions, and season with salt and pepper to taste. Sauté the onions until they become clear and most of the liquid evaporates. About 8-10 minutes. Add the mushrooms, season, and sauté until the moisture is fully removed (this can take up to 15 minutes). Then, add the remaining peppers and sauté until softened.
Add the Tomatoes, Meat, and Beans: Once the vegetables are ready, add the tomatoes, cooked meat, and beans to the pan. Season to taste with salt, pepper, a pinch of allspice, and around 2 tablespoons of ground cumin. Adjust the spices to your liking—add more cumin or heat with chipotle or cayenne pepper if desired.
Simmer: Let the chili simmer with the lid on for about 30 minutes. Afterward, take the pot off the heat and let it rest, uncovered, for 15 minutes.
| | |
If your chili has too much liquid when finished, remove the lid and simmer on low heat, stirring occasionally until the liquid evaporates to your desired consistency. If it is too dry, add in some broth. Let it rest again for 10 minutes with the lid before serving. |
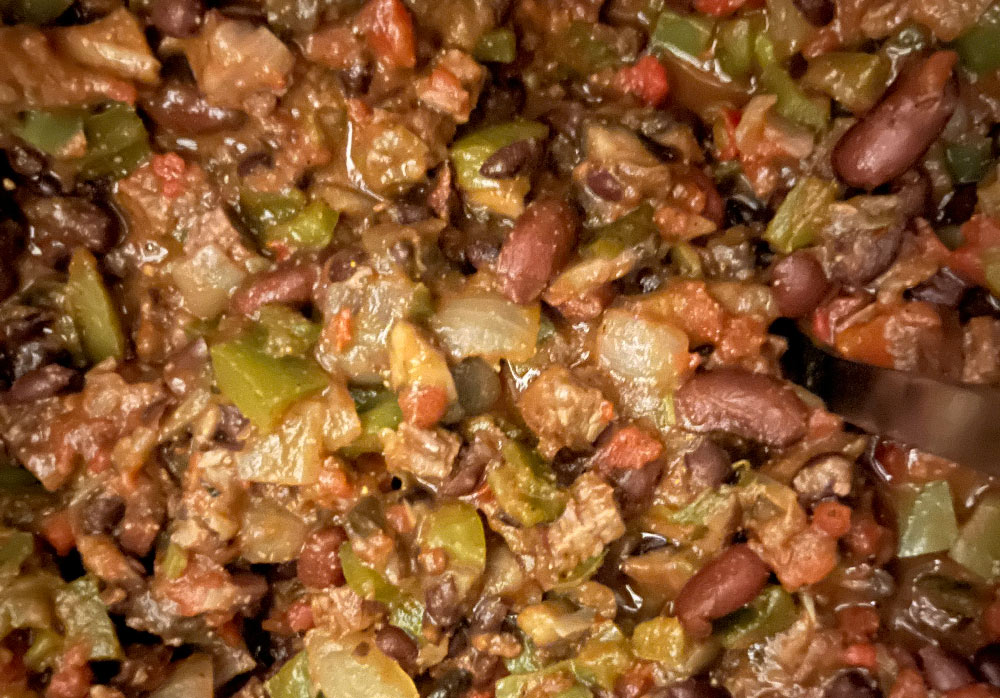
This chili has been a favorite for years, and it's always the perfect dish to serve for game day. The balance of savory flavors and just the right amount of heat will keep everyone coming back for more. Whether you are hosting a Super Bowl party or simply gathering with friends, this hearty chili is guaranteed to be a crowd pleaser.
This Article May Also Interest You: Mushroom Barley Soup for the Coldest Days

Autumn Harvest Squash Soup: A Comfort Food in Every Spoonful
Squash soup is our go-to comfort food when the chill of autumn sets in. This warming cup of goodness is both nourishing and soothing, making it the perfect antidote to a blustery fall day. While we do not follow a rigid recipe, our version of squash soup is always built around a few key ingredients that make it truly special.
At the heart of our soup is a hearty base of local acorn squash, sweet onions, carrots, celery (or celeriac), and potatoes—fresh, simple, and full of flavor. From there, we love to get creative, adding in whatever seasonal vegetables we have on hand—beets, turnips, and even broccoli or cauliflower stems from the fridge. Our rich homemade veggie broth and a blend of seasoning bring it all together, creating a satisfying, yummy soup that’s as wholesome as it is delicious.
This is the kind of soup that warms both your body and soul, and no two batches are ever quite the same—just like the seasons themselves.
| | |
For this batch we are using our veggie broth. It makes a delicious vegetarian version of our soup. We also frequently will use chicken broth. Often our decision is made by what we have at the time we make the soup, you can find which way you prefer this soup and make it your way. |
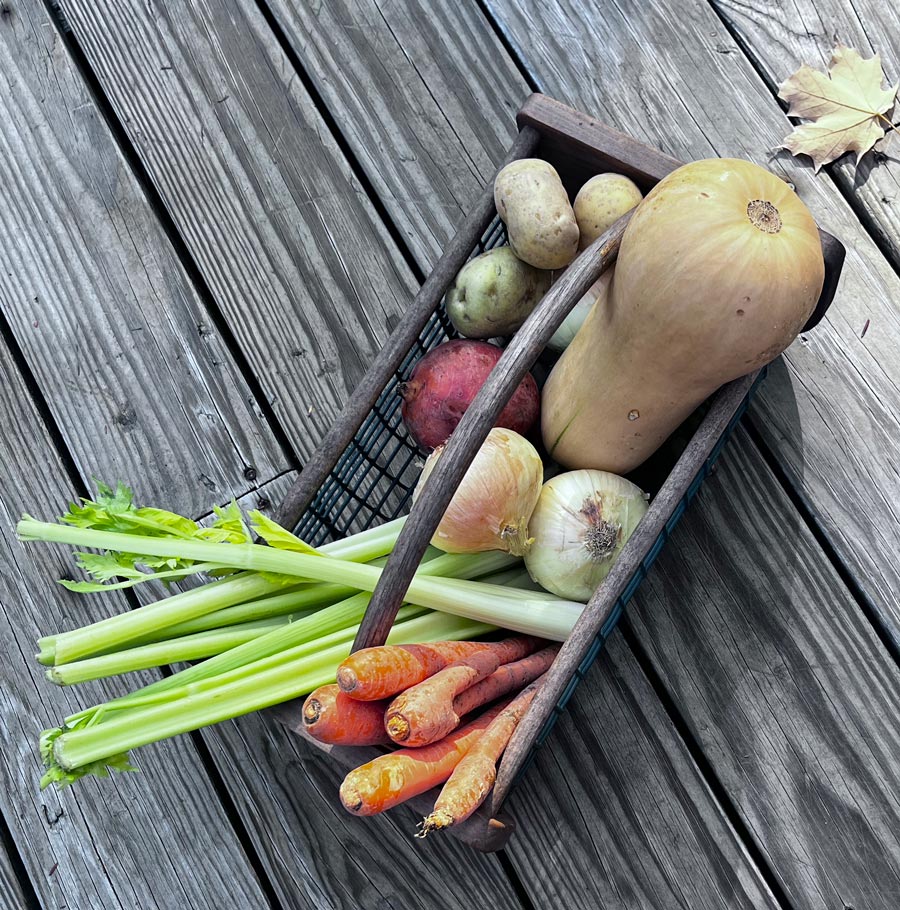
There are a couple of basic ratios that go into this recipe. The squash to potato ration is around 3-4 to 1 squash to potatoes. To this the mirepoix (onion, carrot, and celery) roughly match the quantity of the potatoes. That is if there is one cup of diced potato, use one cup of carrots, one cup of celery and a cup and a half of onions. Other items like beets, turnips, fennel, etc.. are added by eye.
Ingredients:
1 medium to large acorn squash
4 small to medium potatoes
2 medium sweet onions
Carrot, about 2/3 the volume of onion
Celery or celeriac, about 2/3 the volume of onion
1 medium golden beet
1 whole nutmeg grated
Veggie broth, enough to achieve desired final consistency (chicken broth can substitute for veggie broth)
Olive oil
Salt and pepper to taste
Optional: vinegar (to kick down sweetness if needed)
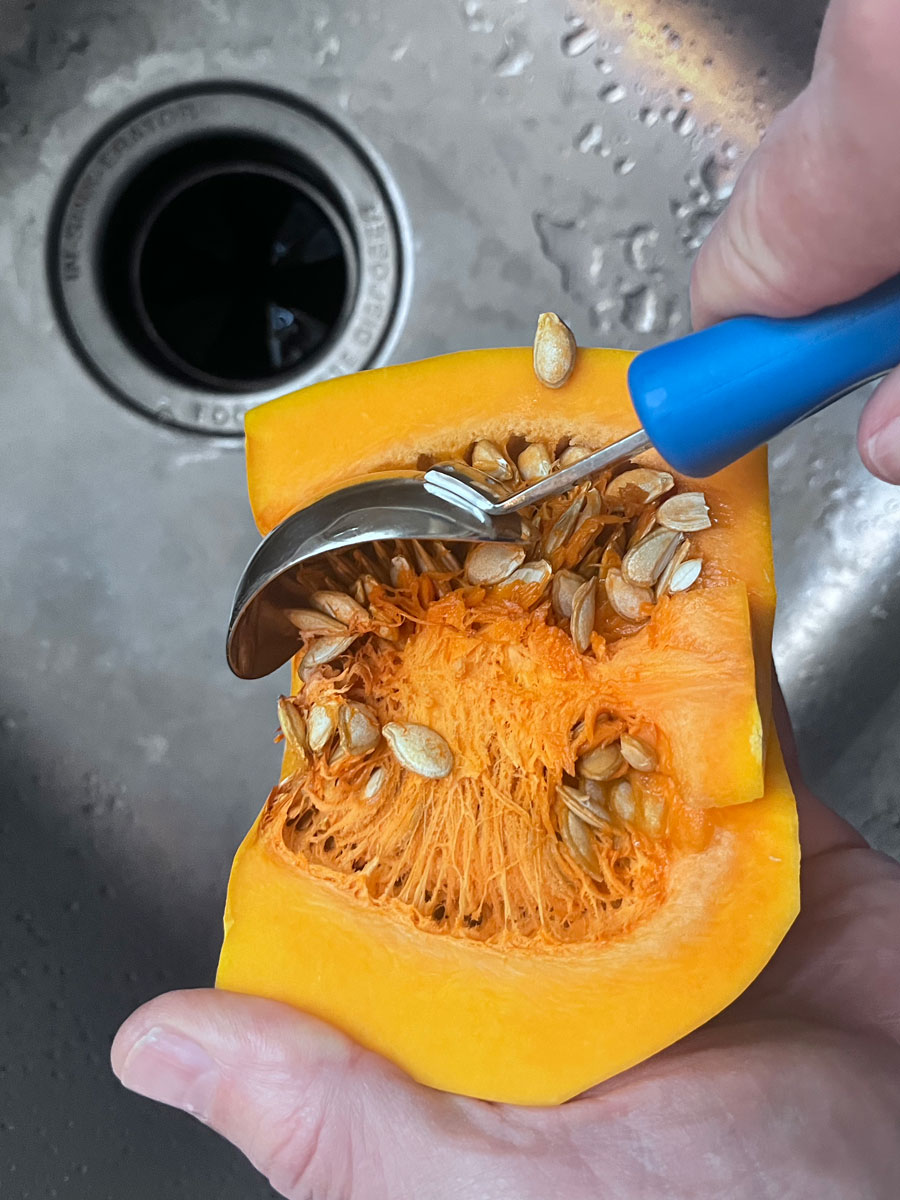
Begin by removing the outer skin on the squash and remove any seed from the lower section. Chop the squash into small chunks about an inch by an inch. Chop the potatoes to match—We scrub the potatoes with a brush and leave the skin on. Only removing bad spots. Collect these in a large bowl and set it aside. Then chop the onion, carrot, and celery coarsely and add to a second bowl that we will add to the pan first. Any other ingredients like beets, turnips, etc.. chop coarsely and add to the bowl.
Heat a 6-12 quart pot on the stove until it has heated through completely. Then add a generous amount of olive oil. To this add the onion, carrot, celery, etc.; season with salt and pepper, and saute until the onions become translucent and the mixture is dry and begins to stick to the pan. Then add the squash and potato, season, add nutmeg, and saute for a minute. At this point the broth goes in. Add enough broth to just cover the majority of the veggies. Then cover and simmer for 30 to 60 minutes, depending on how long the squash and potatoes take to get fork tender.
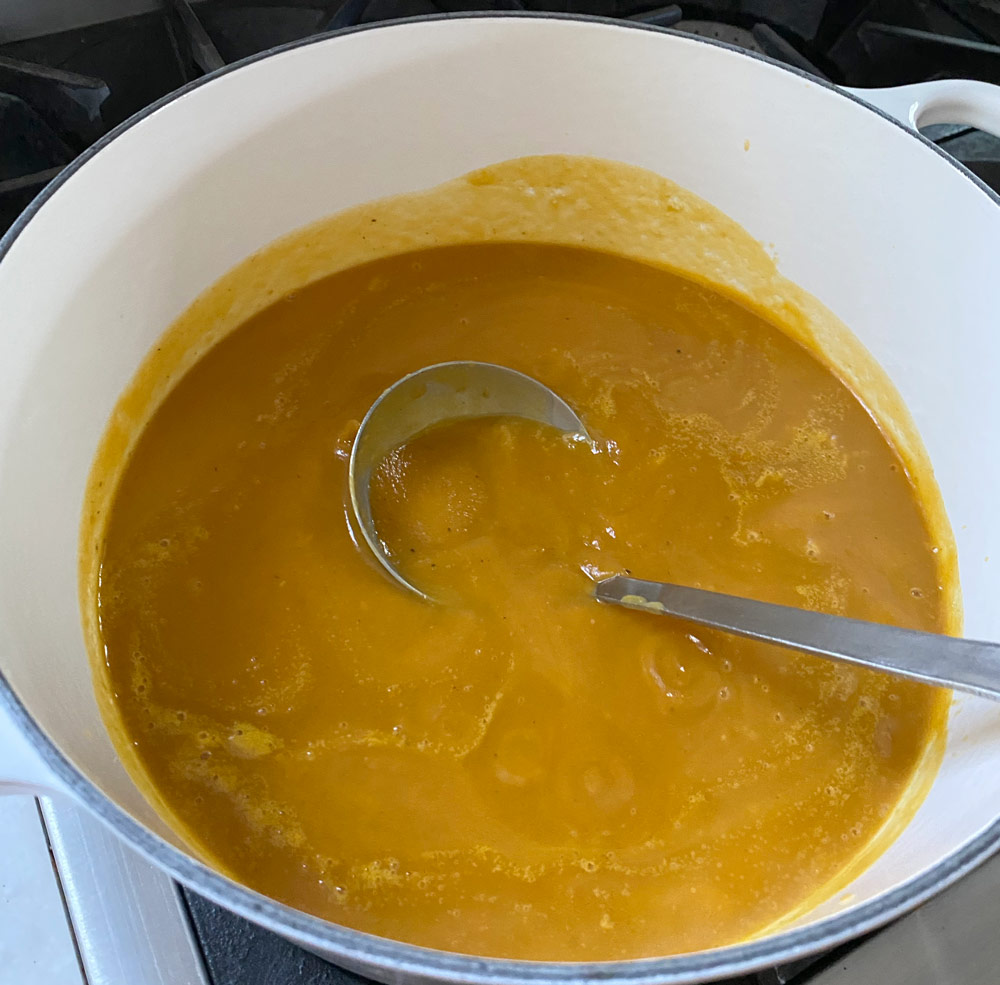
Once the elements are cooked through, using a emersion blender, blend the soup to a smooth consistency. If the soup gets too thick you can add a bit of broth until you get the consistency you are after. We usually add what we think is just enough broth because it is easier to add in later if it gets too thick.
The final step is to season the soup. Add salt and pepper until the soup no longer tastes watery and stop well before you can taste the salt. Can always add salt later. If the soup is sweet—common—add in vinegar a little at a time to bring down the excess sweetness. Will mostly use rice wine vinegar for slight adjustments, and apple cider vinegar if the soup is very sweet. It is remarkable how much the vinegar will bring out the flavors in the soup.

We serve the soup a couple of ways. Our most common way is to add a pinch of black lava sea salt when we serve the bowls. We are careful not to over season the soup when we serve this way. The second way is to toast the squash seeds (or pumpkin seeds) and sprinkle a few over each bowl. However you present this remarkable soup it is delicious, healthy, and satisfying.
This Article May Also Interest You: Two Years, and the Journey Continues

Ginger Lemon Tea
We have adapted a cherished recipe from an old island friend to create our Ginger Lemon Iced Tea. We begin by gently simmering two quarts of water with dried ginger, dried lemon zest, and a teaspoon of whole sugar for hours to create a burst of vibrant flavors. After straining and chilling this concentrated thirst-quenching tea, it's time for a refreshing drink.
Served over ice, with a mixture of half ginger lemon tea and half effervescent bubble water made with our Soda Stream. The result? A revitalizing drink that is perfect for beating the heat on a hot humid summer day. It refreshes and energizes with every sip. Try it! Heidiandtimsplace.com
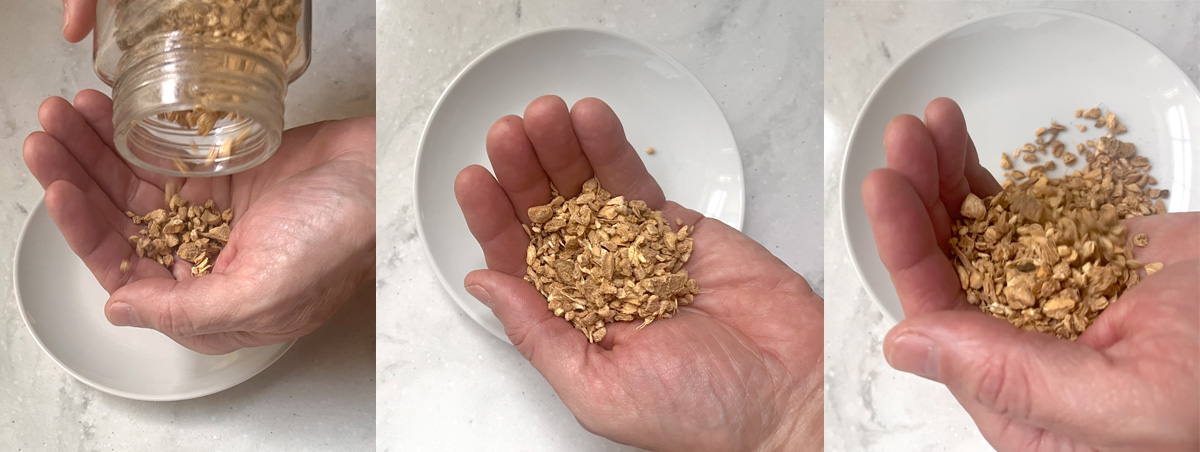
We use a full handful of dried ginger
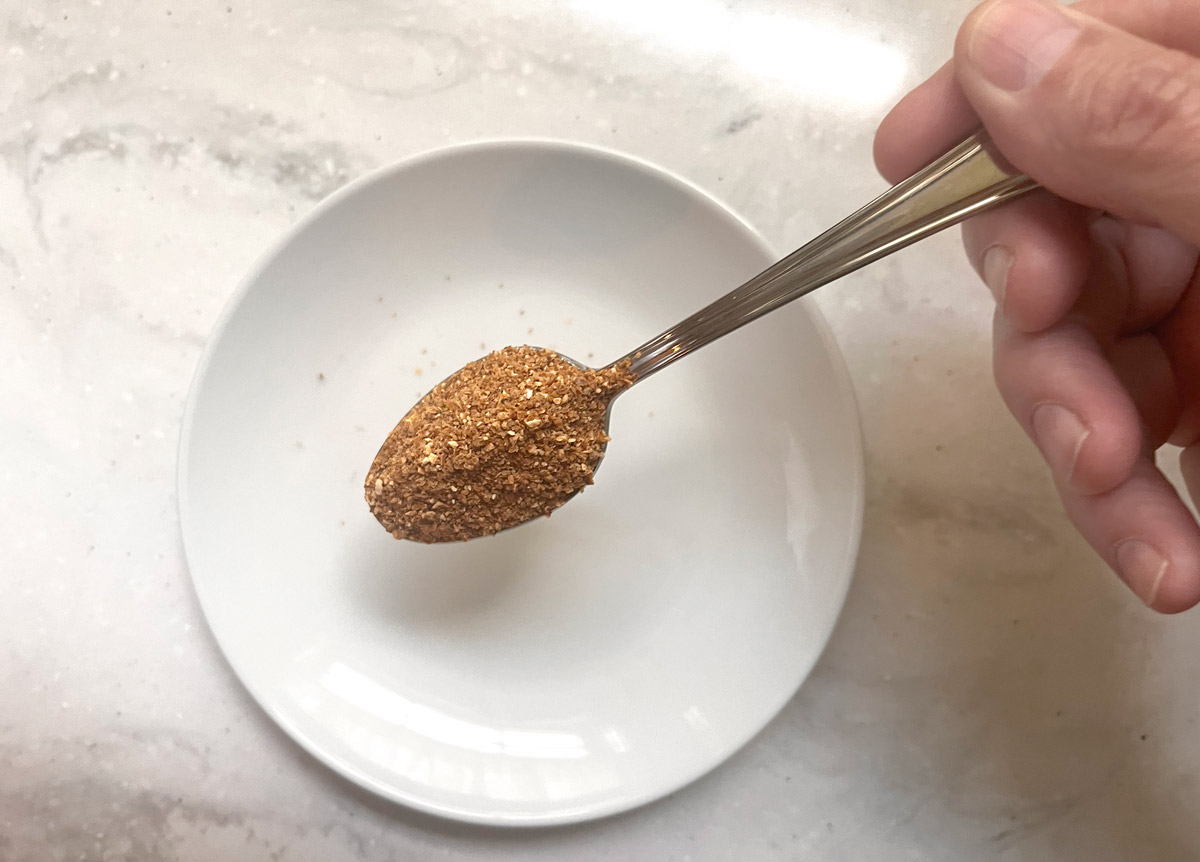
Add a heaping teaspoon of dried lemon zest
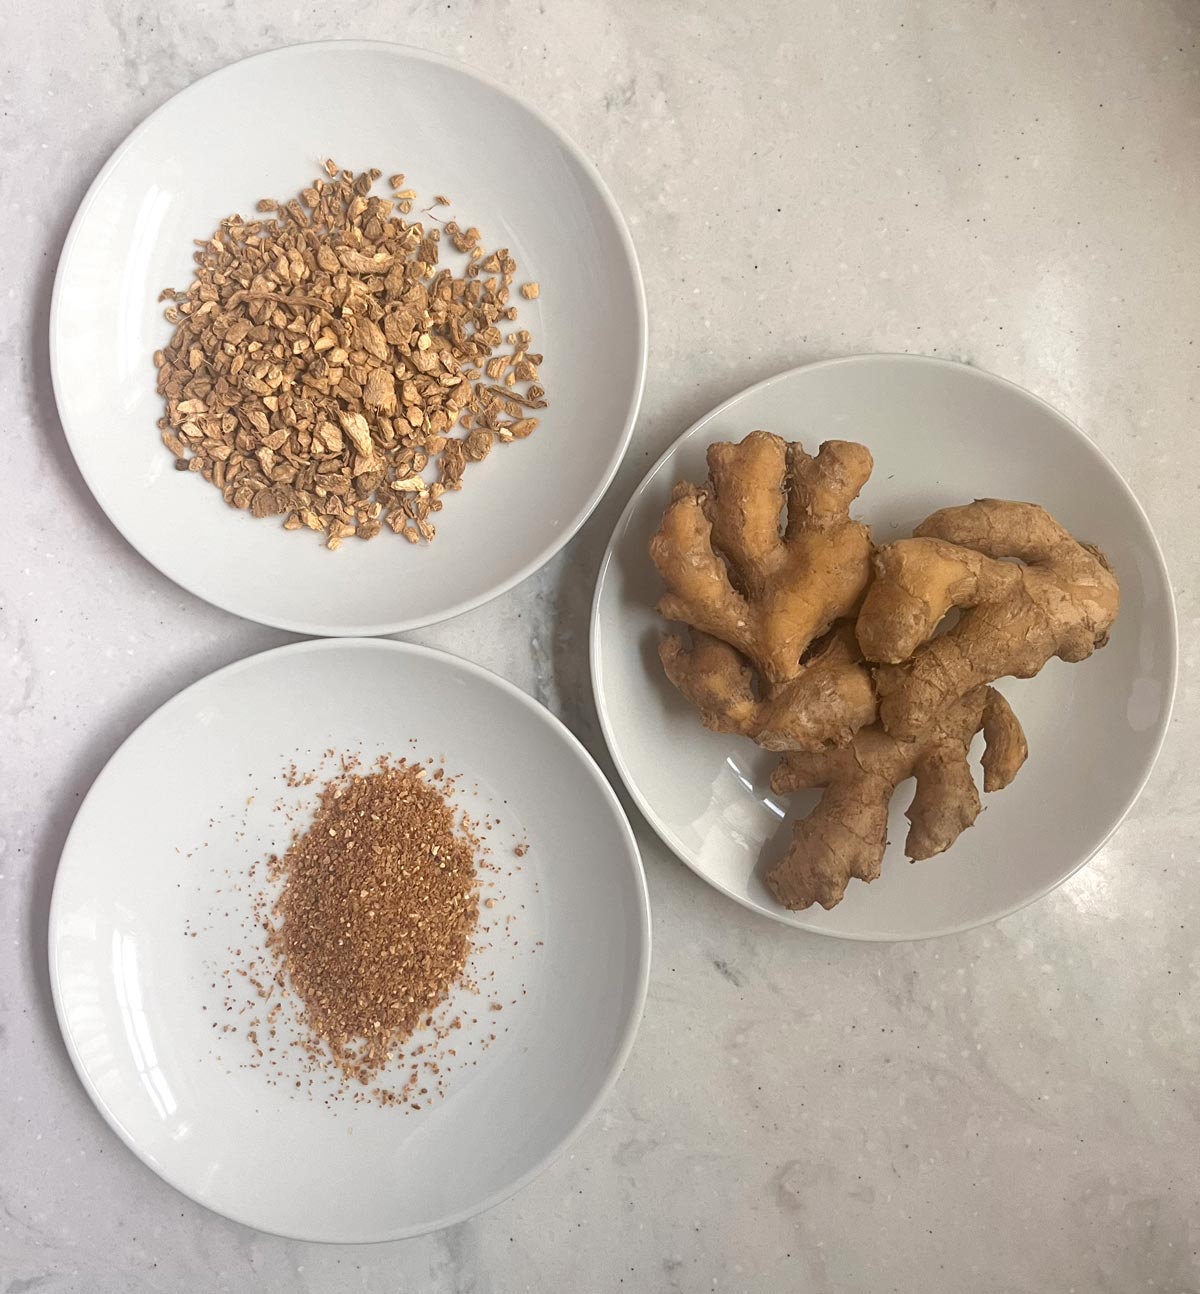
If you use fresh ginger double the amount
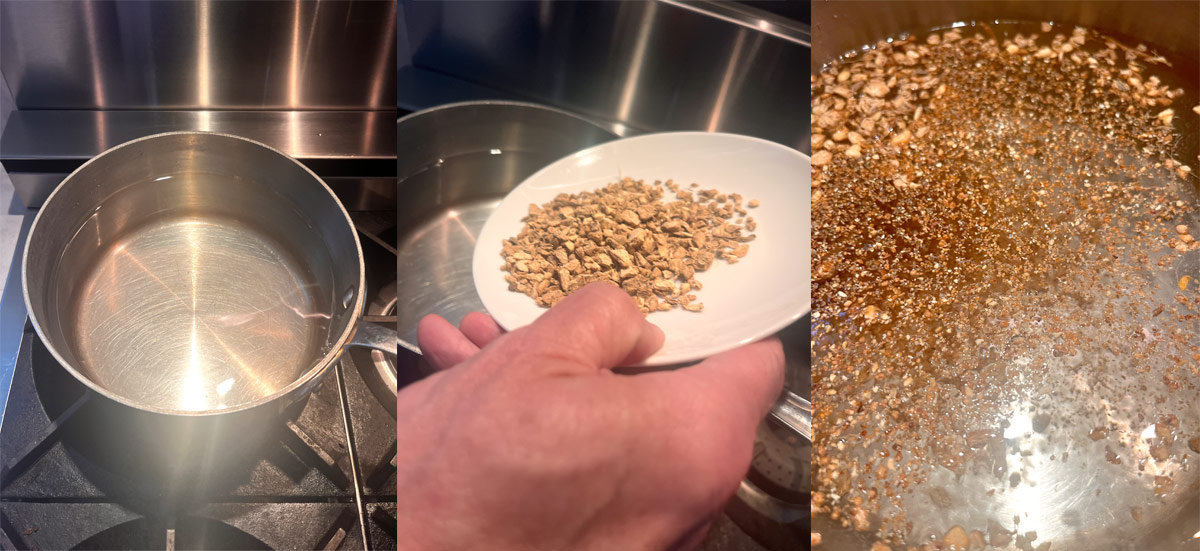
Add to roughly three quarts of water, we add a teaspoon of sugar, and steep for a couple of hours. After it cools a bit, we filter the mixture and enjoy.
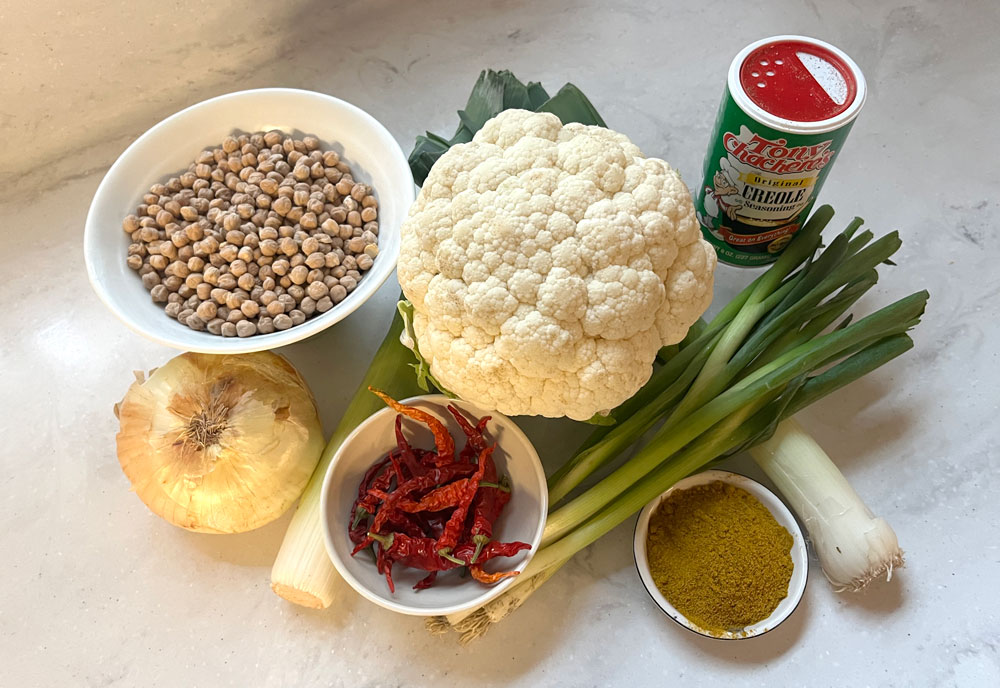
Curry Chick Peas with Cauliflower
Based loosely on Chana Masala which originated in India ,with Mediterranean, Caribbean and American influences, our Curry Chickpeas with Cauliflower is a satisfying dish. This is a simple preparation that usually can be completed within an hour, and is ready to serve warm, or refrigerated and served any time cold. You can make it our way, or make some changes and adjust it to your personal taste.

Click here to watch our video that shows us preparing the recipe
Ingredients:
1 large sweet onion
2 bunches of scallions
2 medium leaks
1 medium head of cauliflower
2 large cans of chick peas. Rinsed and drained
Or
16 oz of dried chick peas reconstituted, rinsed, and drained
1 cup +- olive oil
1 to 2 tablespoons curry
Salt & pepper to taste
Optional: 1 to 2 cayenne peppers (ground if dry, chopped fine if fresh)
Optional: Creole Season to taste
Optional: Plain Greek Yogurt
Preparation:
I find that it is much easier to collect all of the prepared ingredients in individual bowls before I begin cooking. Additionally, I use the bowls as a guide to see and adjust the amount of each ingredient in the dish.
Before I begin I reconstitute my chick peas. You can use canned chick peas as well, but I prefer the dried and reconstituted chick peas. I use an Instant Pot to pressure cook them for about 24 minutes. I let them cool a bit then rinse well and hold aside for the dish.
To begin dice the sweet onion to approximately one quarter inch pieces. Then separate the scallions into two groups with the bottom third (the whiter part) chopped medium fine, and the tops separately chopped coarsely. Remove the dark green tops from the leaks and discard. Then halve the remaining pieces and wash and remove the woody center. Then chop the halves into about an eighth of an inch cross cuts. The cauliflower should be broken into small pieces about double the size of a chick pea and held in a bowl. The cayenne peppers can be ground in a spice grinder, if dry, but I prefer to grind them by hand in a mortice and pestle. If they are fresh, they will need to be chopped finely.
Cooking:
To begin, Heat the pan on a low flame for 3-5 minutes. Once the pan is hot to the touch, add a generous amount of olive oil to the pan. Then add the diced onions and season(I use the term season as a pinch of salt, and some fresh black pepper. The season helps to desiccate or remove excess moisture). Increase the heat and sauté the onions until they appear a bit translucent. Add in some of the curry and (optional) cayenne pepper to the onions and stir.
Next, add in the leak strips, season, and continue to sauté until the leaks wilt. At this point, check the consistency of your pan as you may need to add some oil as you proceed. I will usually add more oil into the dish 2-3 times. Then add in the scallion bases (white part) season, and continue to sauté. Throughout this process you will want to pay attention to the amount of curry as you will want to insure that the curry is slightly caking on the onion mix. You will likely need to add more curry as you proceed.
Then add the cauliflower florets, season, and continue to sauté for 3-5 minutes. The seasoning should color the white cauliflower a yellow curry color. Add the chick peas, mix well, reduce the flame, and cover to simmer for 5 to 10 minutes. Or until the chick peas and cauliflower are cooked to your preferred consistency.
With the flame set to simmer, add in half of the scallion tops (green part) stir in, cover and turn the flame off. Give this 3 to 5 of minutes to rest covered, then taste the dish at this point. Usually the dish will need to be seasoned to taste. I add the creole season and adjust. if you chose not to use creole season, add salt and pepper to your taste. Add remaining scallions mix in and you are finished.
Serve:
I serve with plain greek yogurt, and find that it pairs very well with the flavor of the dish. I usually put the yogurt in a small ramekin, or in a well in the center of the dish. This allows you to select the amount of yogurt and curry chickpeas that you like best.
This Article May Also Interest You: Mallorca: Where Every Turn Reveals Another Wonder

The Chosen Rub
The chosen rub was created to accompany an 86 pound steam ship roast we were preparing for a neighborhood (holiday) gathering. We created three potential rubs (prior to our event) for the roast and (then) prepared small bites seasoned with each of the three choices and polled our neighbors on which one they liked. The result was unanimous and became, “The Chosen Rub”.
While the rub was developed for beef, it pairs well with a variety of food, chicken thighs my favorite, shrimp, roasted potatoes and pork also work really well. The rub also pairs well with other seasoning. We will often use it on the meat, and will season other ingredients separately and the overall flavor is excellent.
This recipe is based on even parts rather than individual measured volumes. This makes it easier to make batches with as much as you need. I usually use 1/4 cup parts and produce about a quart of rub when I make it.
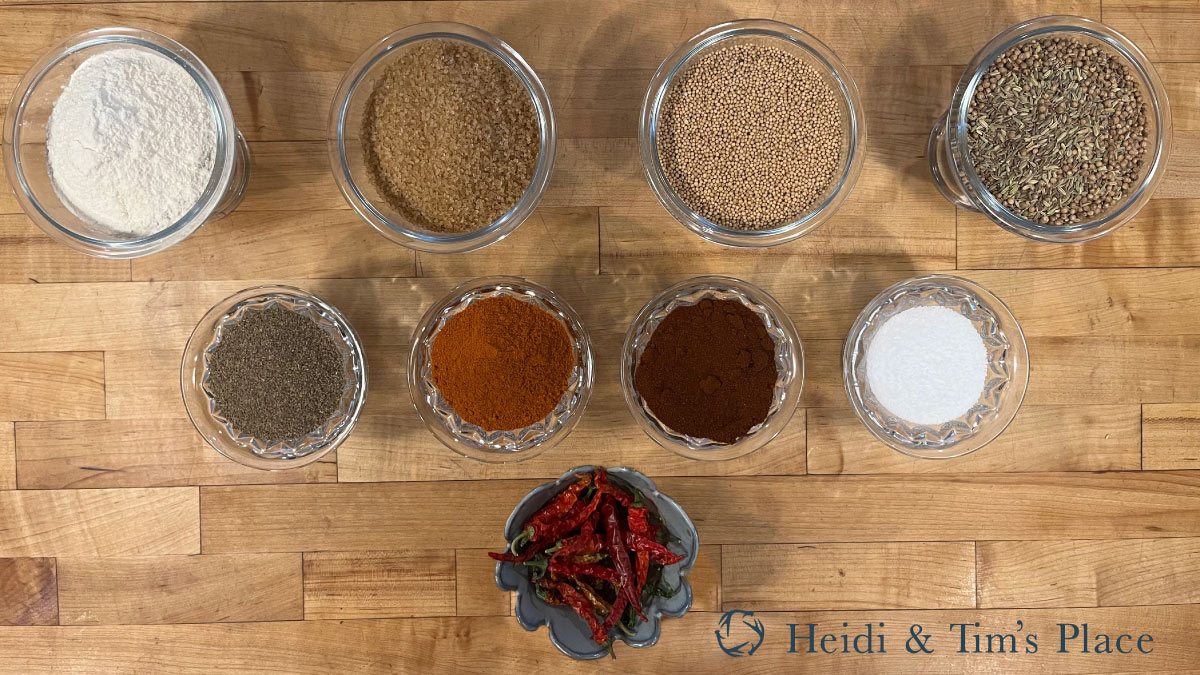
Most of our spice are kept whole as long as possible to maintain the best flavor. Many spices are available in seed form and will last more than twice as long as seeds. The seeds will require a spice grinder to create a powder. An inexpensive coffee grinder works great for this job.
The ingredients: 2 parts - Yellow Mustard Seed 2 parts - Meat Base 1 part - Celery Seed 2 parts - Onion Powder 2 parts - Kosher Salt 3 parts - Turbinado (whole) Sugar 1 part - Ground Chipotle (smoked Jalapeño) 1 part - Ground Cayenne Pepper
To begin toast the mustard, meat base, and celery seed over a low flame until they are fragrant. Be careful not to burn the spices, if the seeds begin to pop, remove from the heat source. Let the seeds cool a bit while you assemble the other spices in a large mixing bowl.
Grind the spices until you achieve a smooth consistency. Depending on the size of your grinder, you may have to grind the seeds in batches. Once ground just add to the ingredients assembled in the large mixing bowl and stir together with a whisk.
I store the rub in glass jars with lids that close tight to keep the rub as fresh as possible. We have found that jars for canning work very well for this as they are large enough, and they close nice and tight.
The Chosen Rub is a highly versatile season that is an essential ingredient in many of our dishes. Make a batch and give it a try on some of your favorite foods as you discover at Heidi & Tim’s Place.
This Article May Also Interest You: Mushroom Barley Soup for the Coldest Days
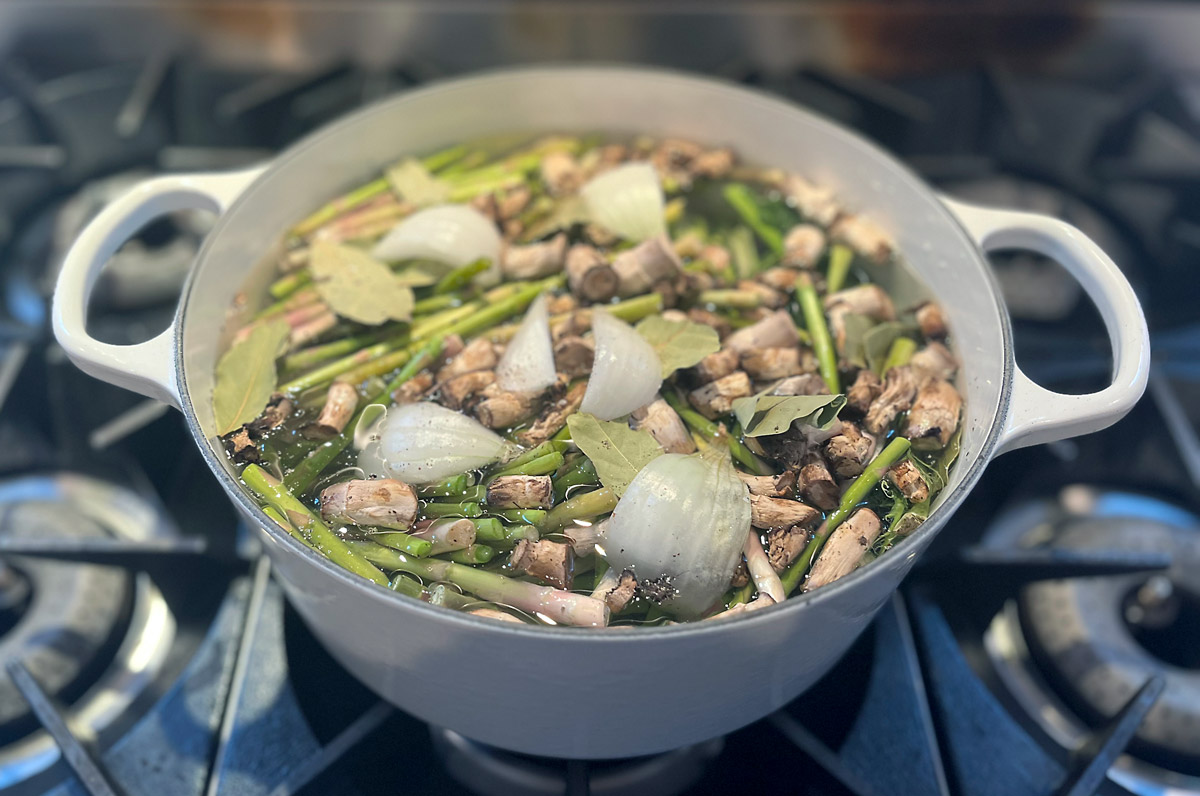
Veggie Broth
A really good veggie broth can complement some ingredients, and transform some dishes to the next level. We have found that some of our lentil dishes and soups are much better when we use our veggie broth over chicken or other broth. While it does take some work to save and collect the kale and mushroom stems, the scraps from asparagus, and other unused parts, it is definitely worth the effort.
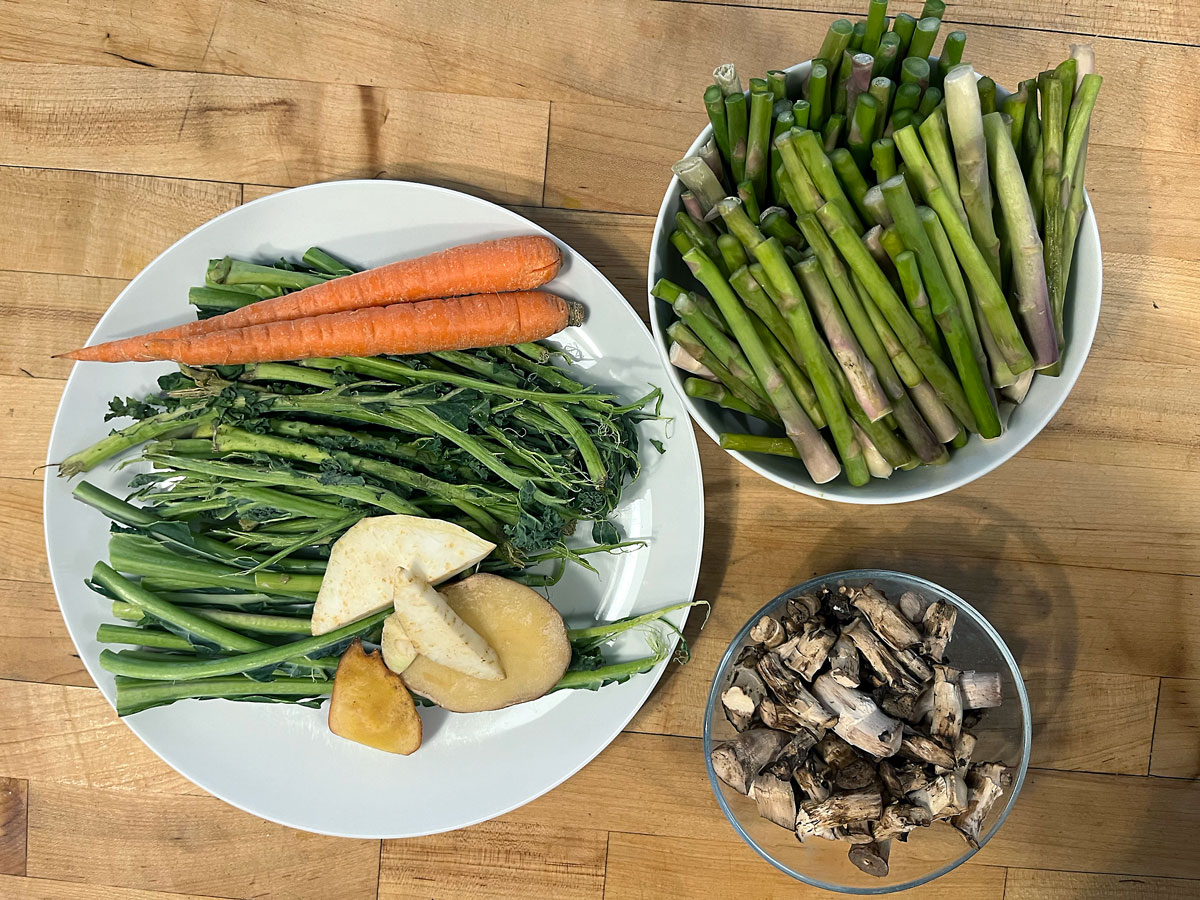
Collecting, and effectively storing, the leftover stems and other scraps is the most important part of making the best broth. We consider this collaboration essential. At our place, Heidi has managed the refrigerator since working from home during covid. She will keep all of the scraps for the broth together and safe from spoilage. Once we have enough collected for a broth we will schedule a day to cook out the broth. My job in this circumstance is simply to assemble the ingredients, season, and cook out the broth.
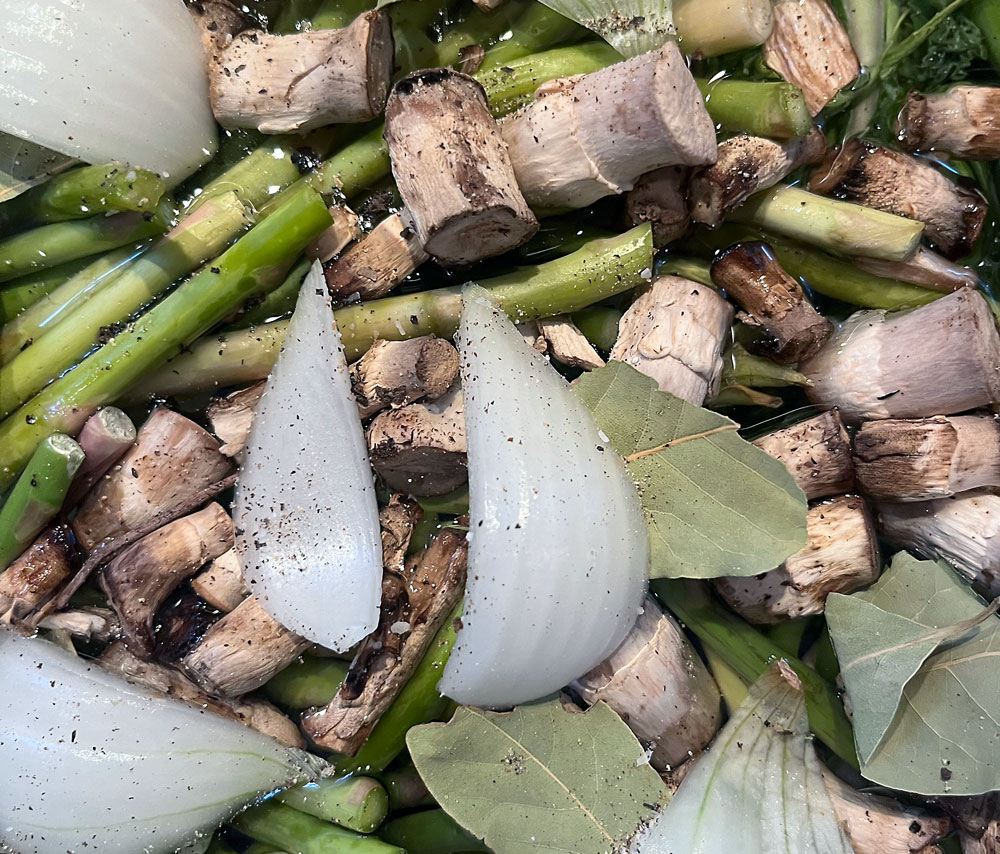
We usually will have a bunch of stems from Kale, some cuts from asparagus, mushroom stems, scraps of broccoli, cauliflower, and fennel. Onion, celery, and carrots are always added to the brew, along with bay leaves, salt and pepper. Add in enough cold water to cover the veggies and you will have a fantastic broth in a couple of hours.
| | |
The balance of ingredients is personal, and you may have a different list of scraps to choose from. The key is to taste your broth and adjust to your needs and taste. |
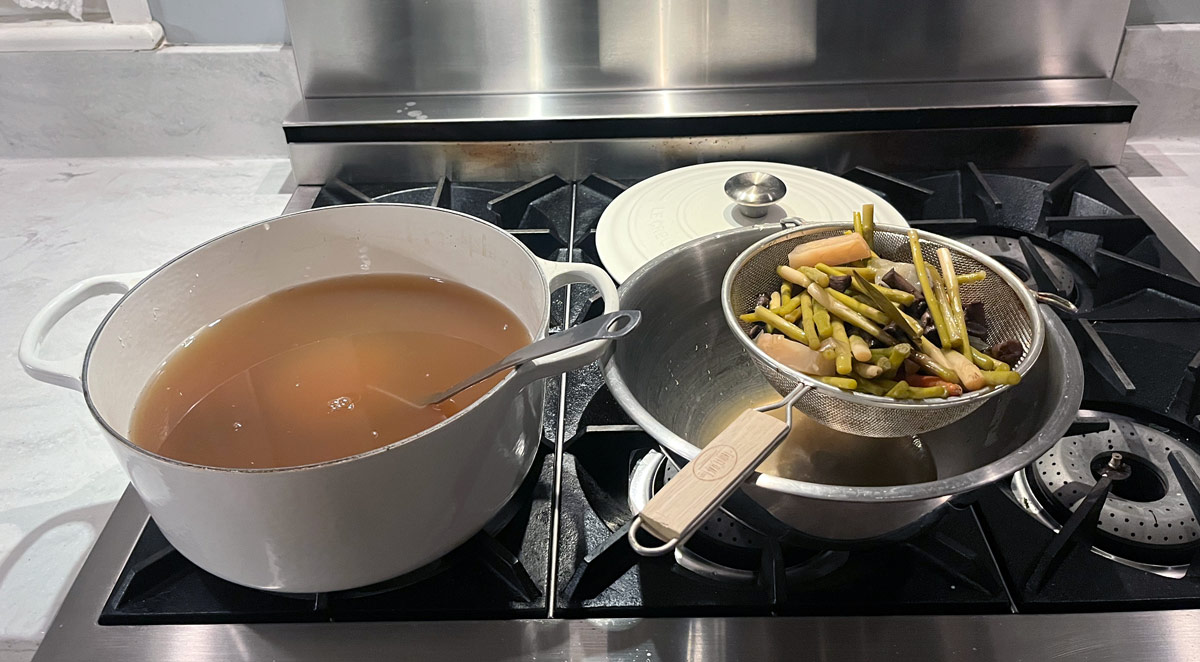
Our veggie broth enhances our meals throughout the week. Whether it’s used as a base for squash soup, mushroom & barley soup, zucchini & tomato soup or broth base for our lentils. Just remove the cooked veggies, strain and you are ready to enjoy this wonderful broth. Every spoonful of these dishes is infused with the essence of locally sourced, sustainable ingredients, and a flavor that will have you saving your scraps for the next batch.
This Article May Also Interest You: Mallorca: Where Every Turn Reveals Another Wonder